12 Cedar Shingle House Exterior Ideas: No Edges Without the Trim

Add us as a preferred source to see more stories on Google.
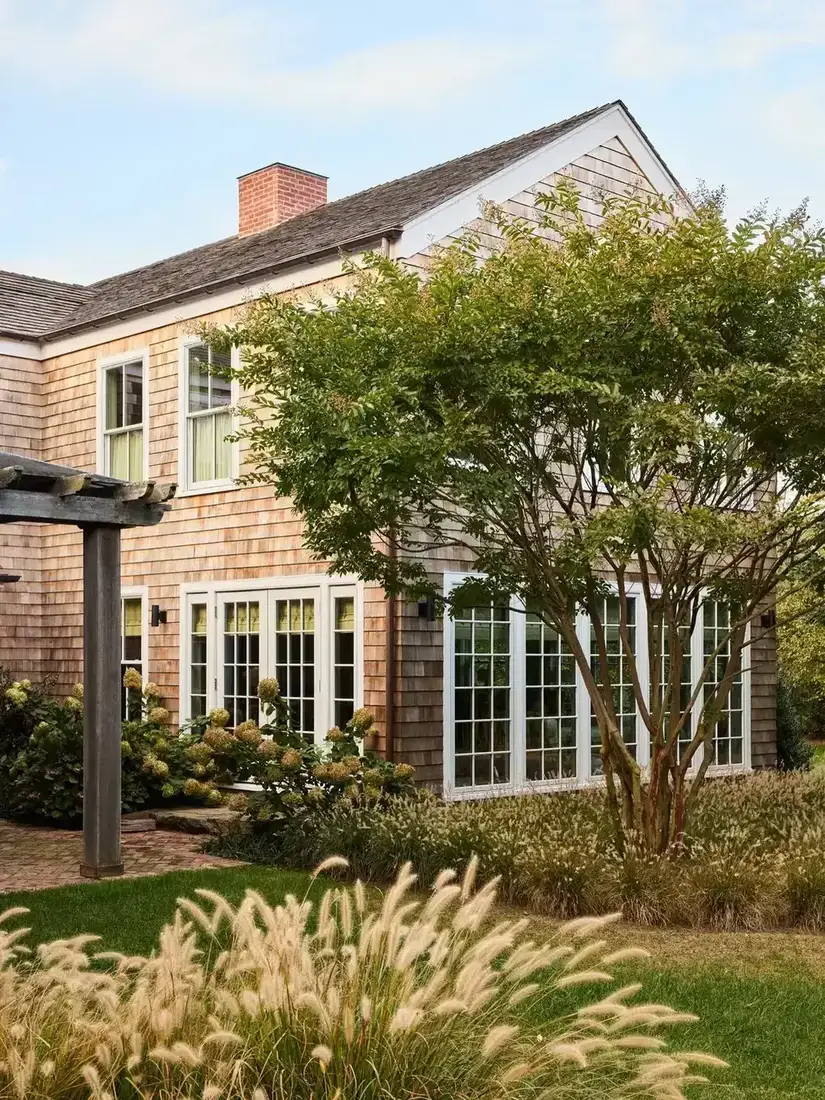
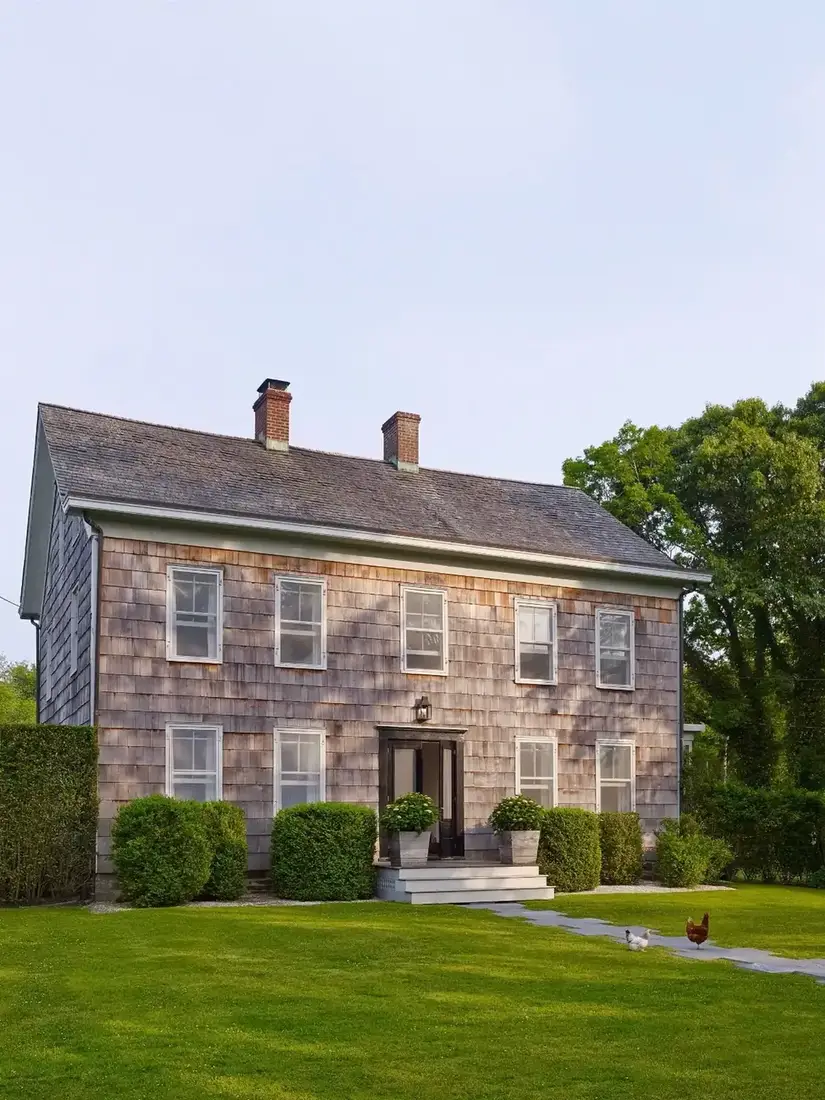
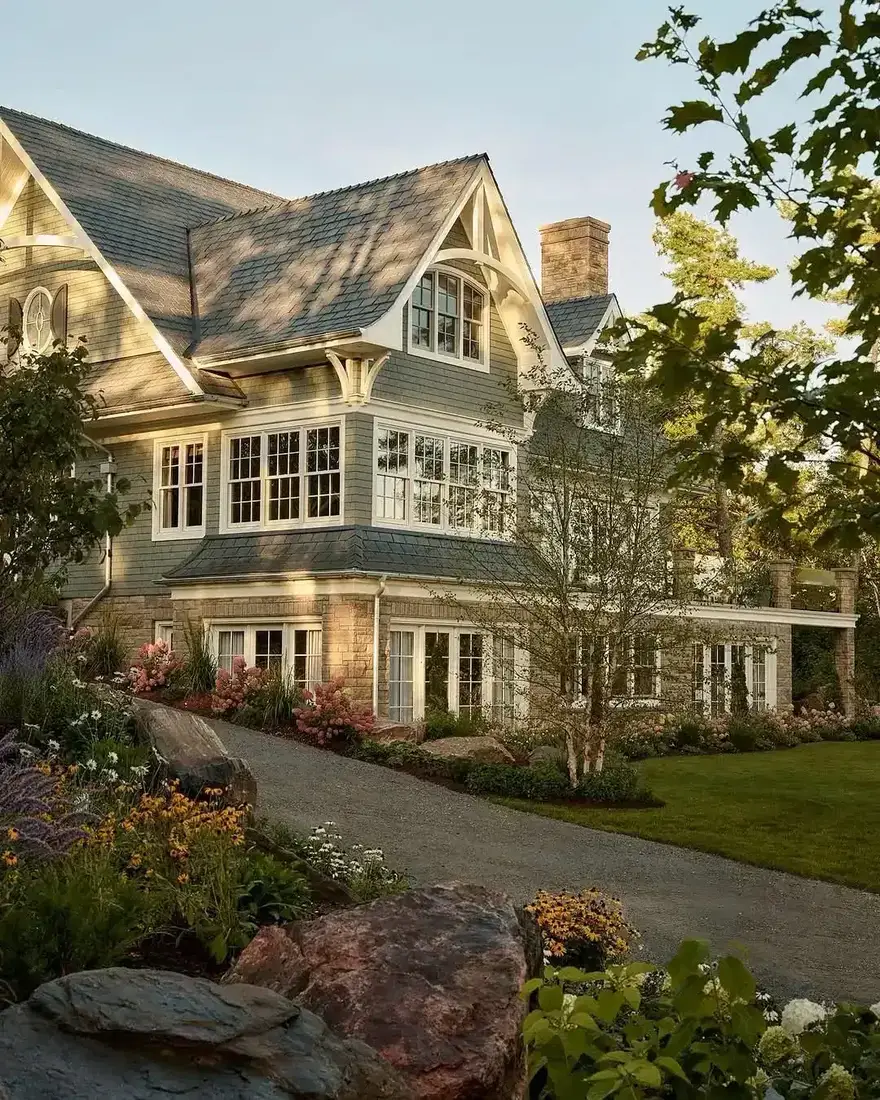
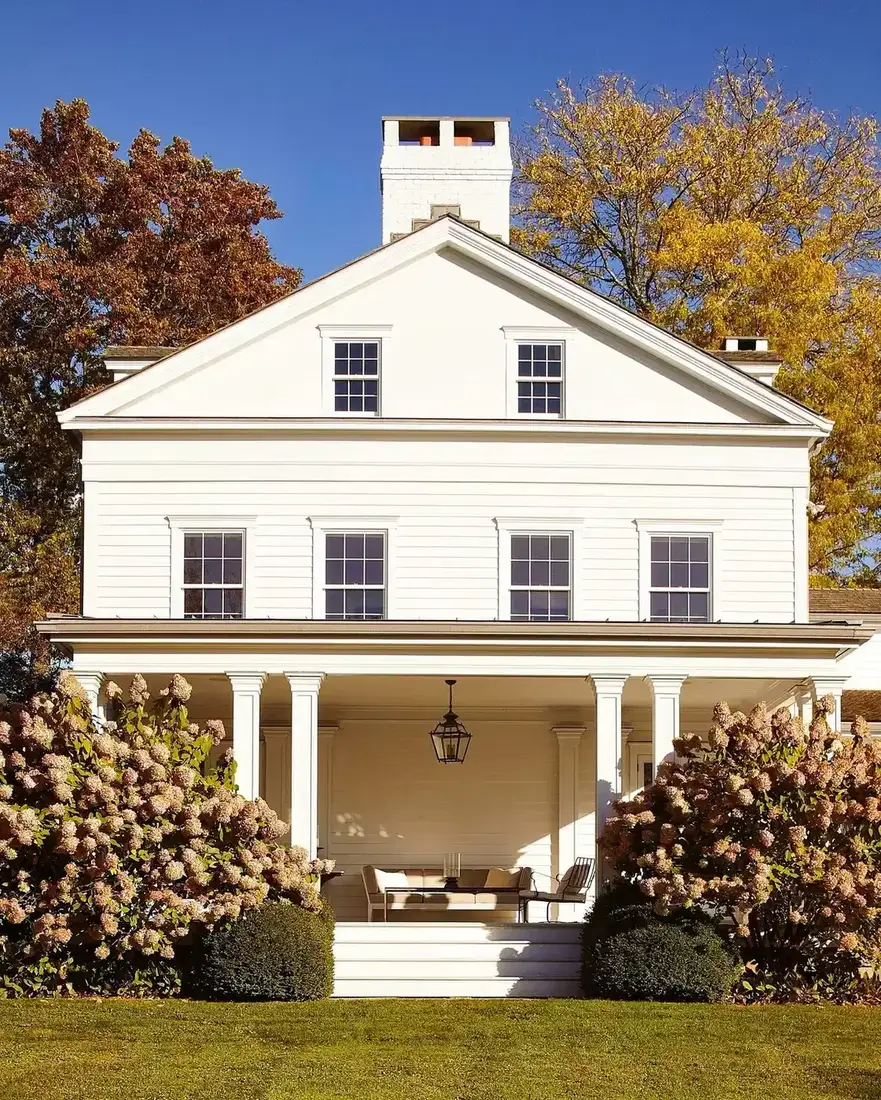
Cover the white joinery on the house below with your thumb and see what is left.
A soft, textured, irregular surface with holes in it. Cedar shingle has no straight lines of its own; every course is slightly uneven, every butt joint is slightly off, and the whole thing weathers unevenly.
That is the appeal and it is also the problem. The white trim around the windows, along the rakes and at the corners is what gives that elevation any geometry at all. The shingle is filling in; the joinery is doing the drawing.
Proportion, which is the whole thing
Trim on a shingle house should be fine. Thin sections, crisp arrises, and no more depth than the job needs.
The instinct on a new build is to go heavy, because heavy trim reads as substantial on a drawing. On a shingled elevation it reads as clumsy, because the contrast between a thick white band and a soft texture is enormous.
Look at the window surrounds on that house: they are narrow, square-edged and sit almost flush with the shingle face. The windows themselves have fine glazing bars. Both decisions make the house look older and better than a chunkier version would.
The same applies to the rake boards along the gable, the fascia and the corner boards. Narrow, consistent, and all the same width wherever possible.
Corners: woven or boarded
This is the decision most people never make consciously, and it changes the building.
Woven corners run the shingles round the corner, alternating which side laps over, with every course mitred and interlocked. There is no trim at all; the texture simply turns the corner. It is the traditional detail, it looks superb, and it takes a skilled shingler considerably longer.
Corner boards run a vertical timber board up each corner and butt the shingles into it. It is faster, cheaper, more forgiving of a less skilled hand, and it gives the house a crisp vertical line that some elevations want.
Neither is wrong. What is wrong is not choosing: a badly woven corner is visible from the road forever, and a corner board of the wrong width throws the whole elevation off.
If the budget is tight, board the corners and spend the saving on the window trim, which is more visible.
The trim colour
White, off-white, or the same colour as the shingle if it is stained.
White against natural weathering cedar is the classic and it works because the contrast is maximal, which is exactly what a shapeless surface needs. Off-white is softer and suits a house that has already silvered.
What generally fails is a mid-tone trim. Grey or beige joinery against grey-brown weathering shingle gives the eye no boundary, and the house loses its drawing entirely.
Paint the trim before the shingles go on wherever possible, and certainly prime all faces including the back. Trim on a shingled wall is hard to repaint later because the shingle butts into it.
What the copper is doing
There is a copper downpipe on the corner of that house, currently brown and heading slowly toward green.
Copper on a shingled house is a traditional and good pairing, because both materials are meant to change. A plastic downpipe on a cedar house is the detail that most reliably cheapens an otherwise expensive elevation, and swapping to aluminium or copper costs less than most people assume.
Trim colours that work against weathering cedar: Farrow & Ball Pointing and Wimborne White, Benjamin Moore White Dove OC-17 and Simply White OC-117. For an exterior product, Sadolin Superdec and Dulux Weathershield both hold up, at roughly £40 to £60 for 2.5 litres in 2026 against £70 to £90 for the premium ranges. For shingles themselves, look for No.1 Blue Label Certigrade; Maibec and Cedar Shakes and Shingles are the usual suppliers.
The bit people get wrong afterwards
Pressure washing.
Shingle picks up algae on shaded elevations, and the reflex is to wash it off. A pressure washer takes the surface fibres with the green, leaves a fuzzy wall, and the regrowth is faster every time.
A soft brush and a proprietary biocide left to work does the job without damage. On a north wall, some greening is simply what cedar does.
The orange year and what to leave alone
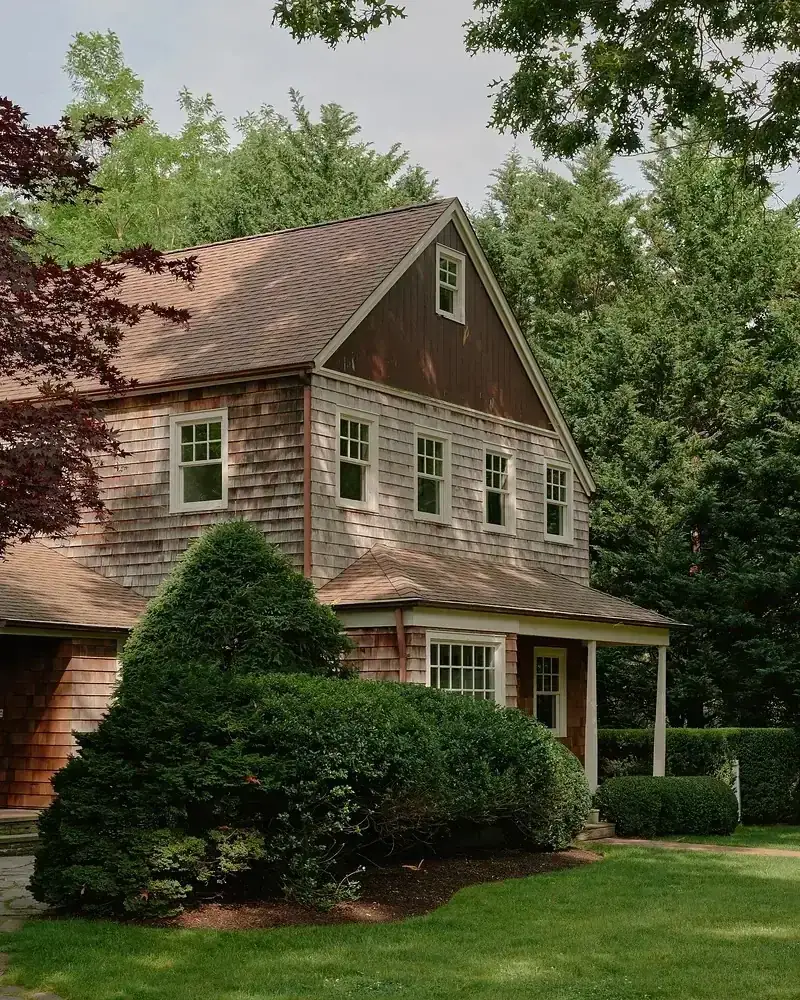
In this photo the wall is doing the thing that panics new owners. The lower courses have gone orange brown while the upper gable still reads pale, and the whole elevation looks streaky from the lawn.
That is year one. Fresh cedar goes up honey gold, then sun and rain pull the surface extractives down the wall in stripes. The tannins in western red cedar are acidic, and rain carries them. Leave it.
First fix the order. Decide the finish before the scaffold comes down, because bare, bleached, or stained are three different maintenance futures. Bare needs nothing except patience for 2 to 5 years to silver. Stain needs recoating every 5 to 8 years. Bleaching oil sits between, with an optional top up. Pick one.
Do not coat in year one because the colour alarms you. A panic coat locks the blotches in, and the only fix is sanding. The wall in that image wants another summer of sun, not a tin of stain. If the orange bothers you from the kerb, look at the white windows instead. The trim holds the elevation while the shingle sorts itself.
Silver starts where the sun hits
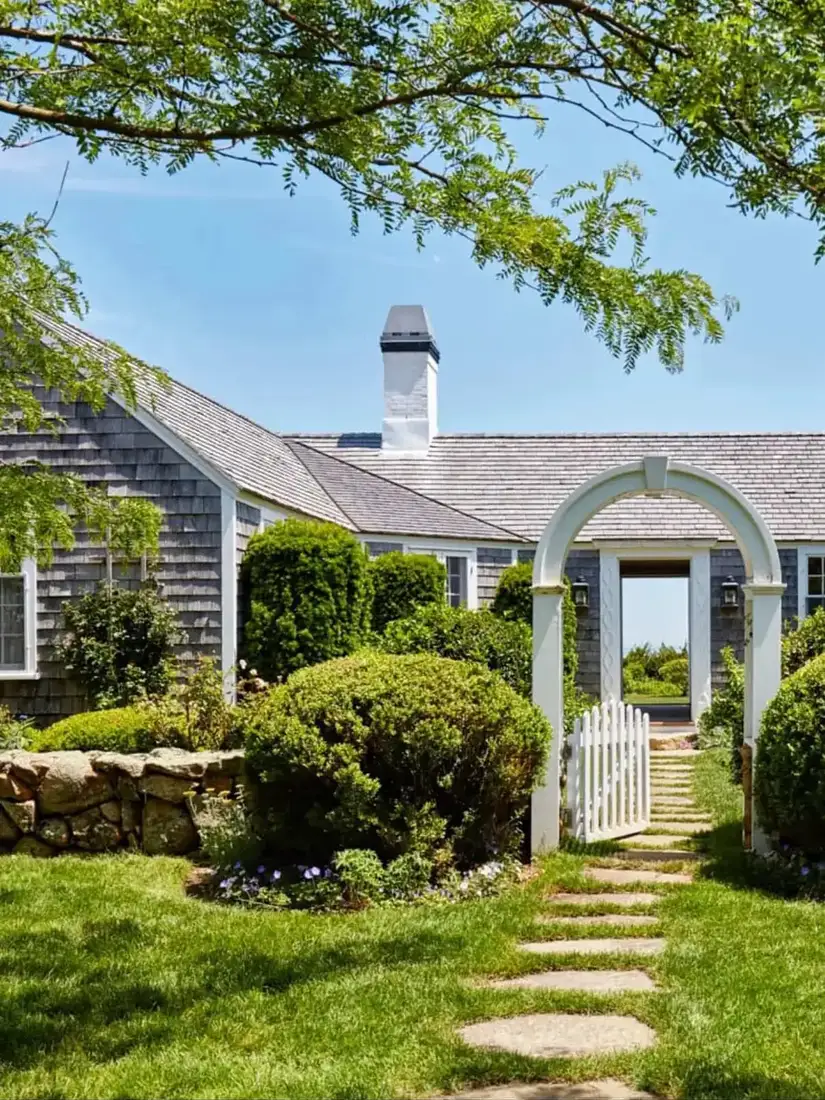
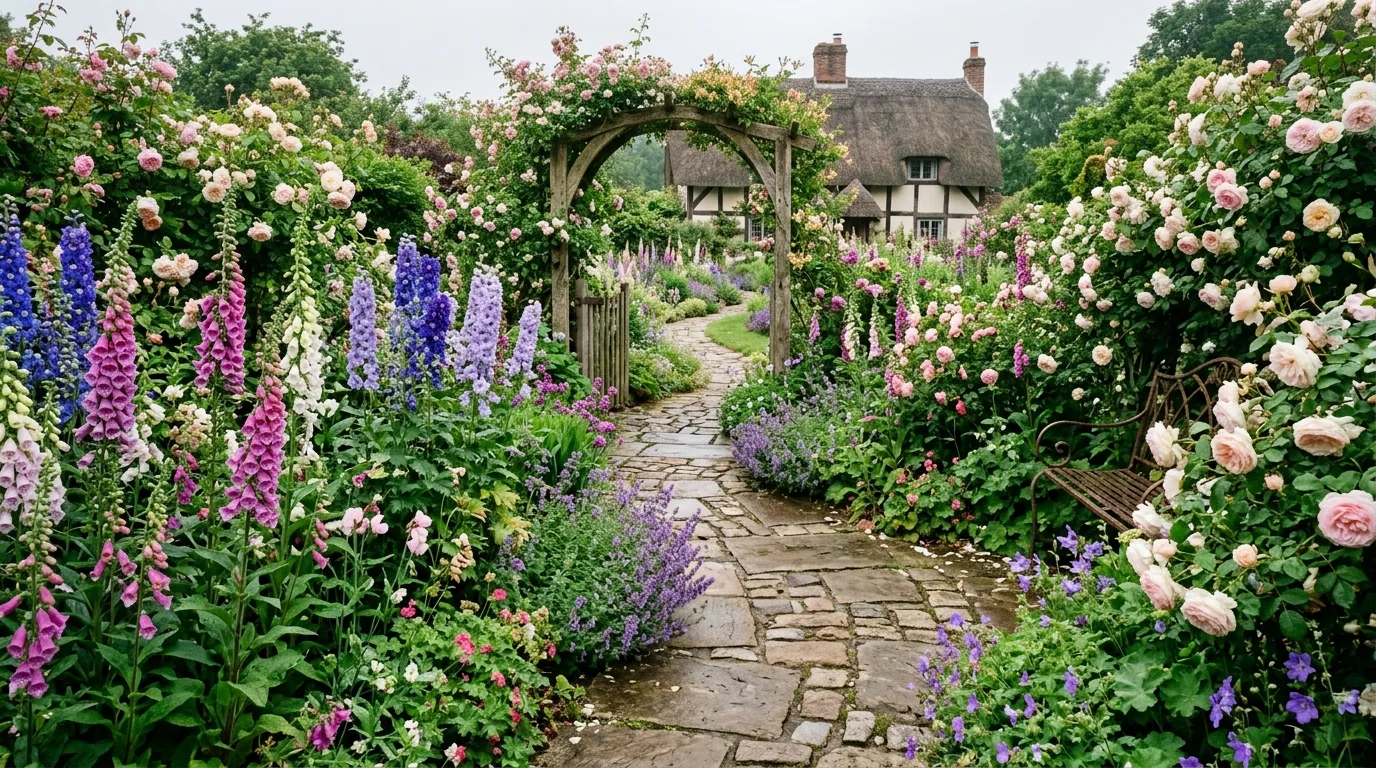
The cottage through that white arbor shows the next stage clearly. The wall reads as even silver grey, with only a faint brown still sitting under the eaves where rain never reaches.
Notice how the change follows exposure. Sun and wind do the work, so south and west walls silver first while sheltered spots lag a season or two behind. Salt air speeds the process, which is why a seaside wall can be most of the way there in two years while a shaded north wall takes five. That spread is normal.
Count the places where the silver is palest in that image. The open wall to the right of the gate, the courses above the stone boundary, the chimney breast. All face the sky. The courses tucked behind the shrubs stay darker longer because foliage blocks sun and holds damp.
The job here is trimming, not coating. Cut back the shrubs so air moves, keep the base course clear, and let light reach the wall. Cabot bleaching oil at around £55 to £85 for 5 litres in 2026 will even the tone in one season if impatience wins, though it is a colour choice, not protection, while the ventilated gap and the fixings do the protecting through every winter.
Thick shakes dry slower, so the gap matters more
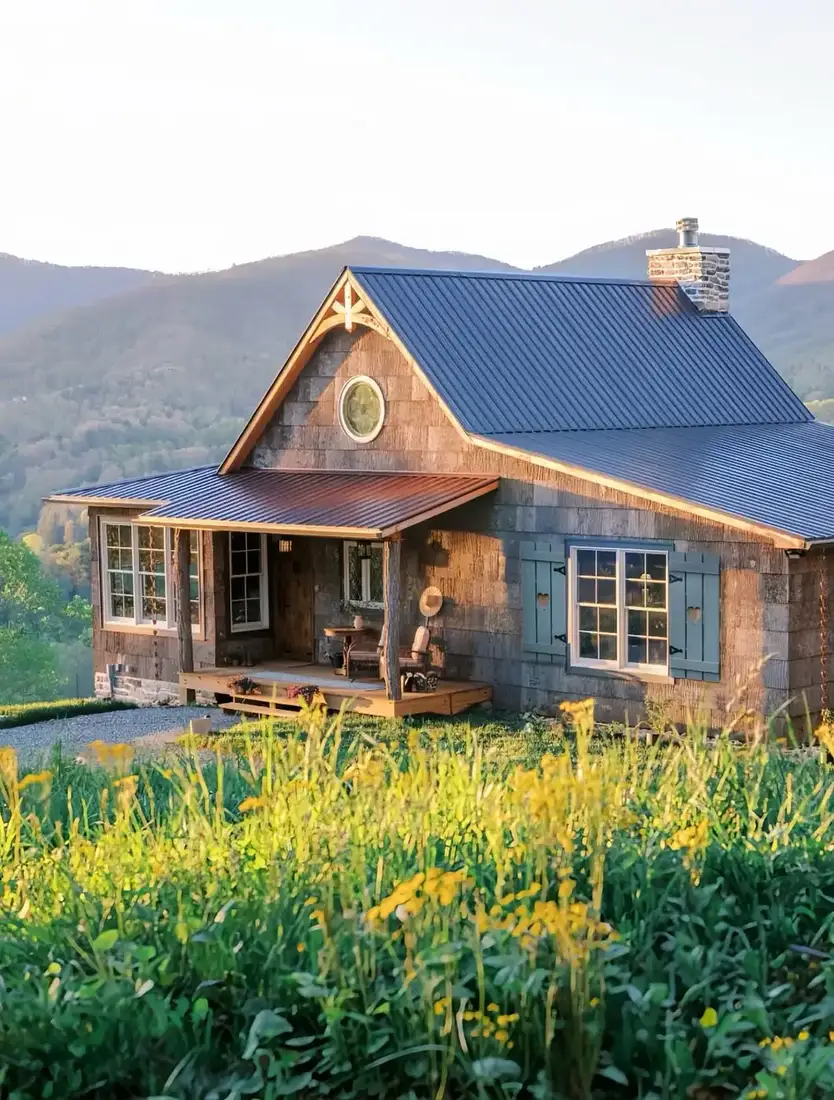
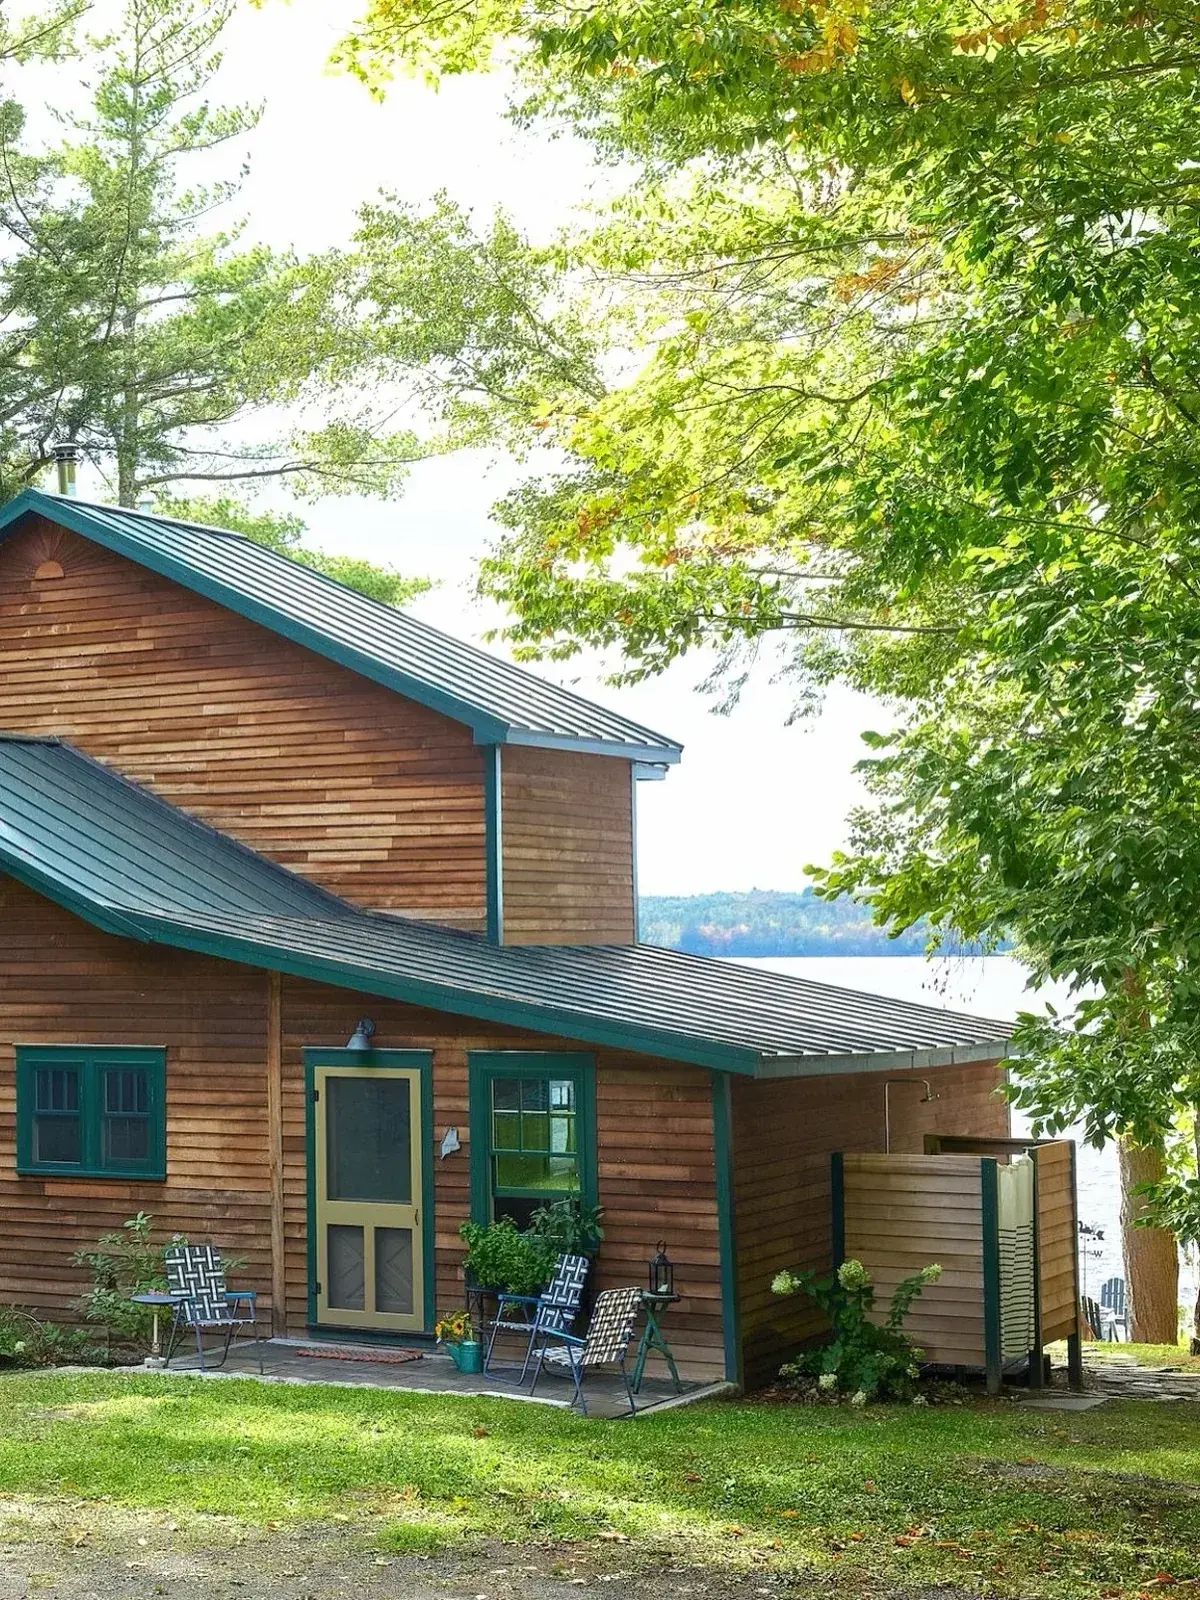
That mountain cabin is clad in shakes, not shingles. The courses throw a heavier shadow, the butts are uneven, and the surface reads rustic from a long way off.
The cut changes the look and the drying. Shakes are split, thicker, and more irregular than sawn shingles, so they hold water longer after rain. Fix them tight to sheathing and the backs stay damp. That is where rot starts, quietly, where no one sees it.
Build a ventilated rainscreen behind the cladding. Battens hold the courses off the sheathing, air enters at the bottom and leaves at the top, and both faces dry. The detail roughly doubles the life of the wall compared with direct fixing, it costs little at build stage, and it cannot be retrofitted without stripping the wall. Put it on the drawings.
Hand the roof junction to someone who does it weekly. That blue standing seam roof meets a rough shake gable at a round window and a low porch roof, and every one of those junctions needs flashing that moves. A bead of sealant is not flashing. Water behind shakes shows inside two or three winters later, and by then the repair means opening the wall.
Dark stain hides the streaks and signs you up
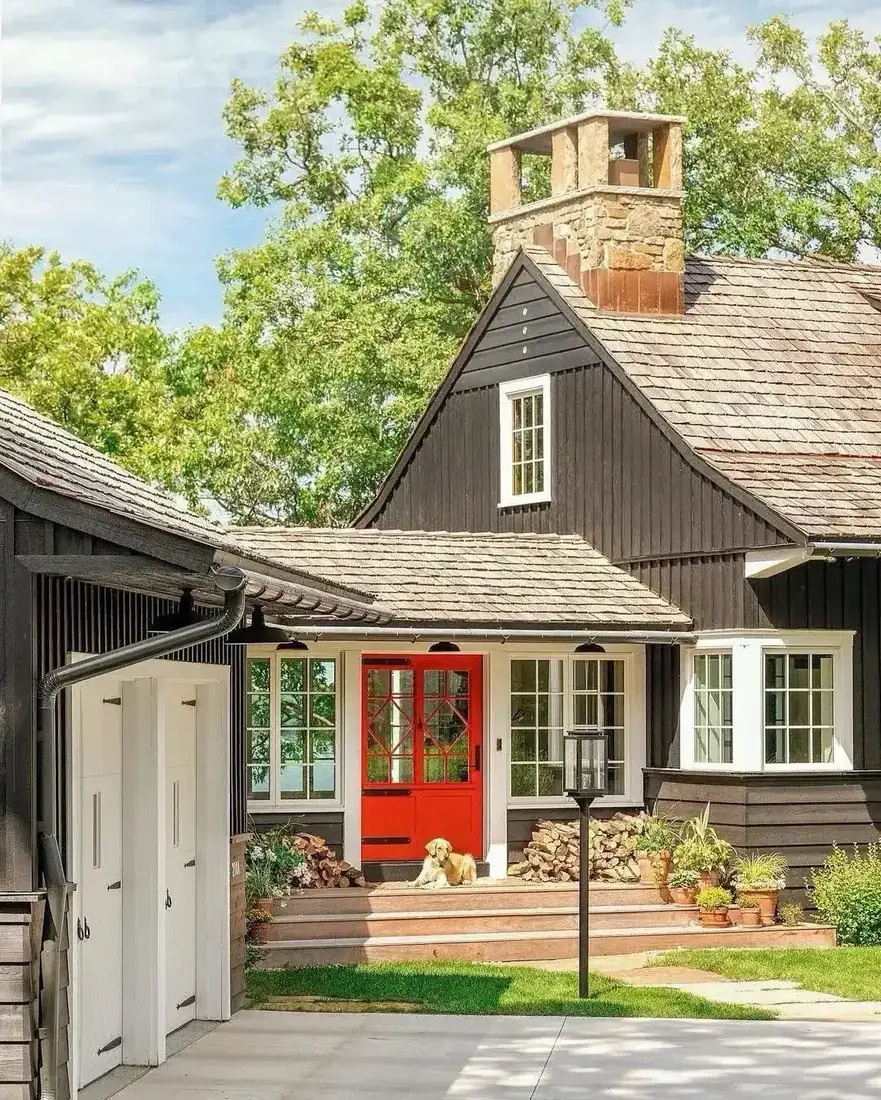
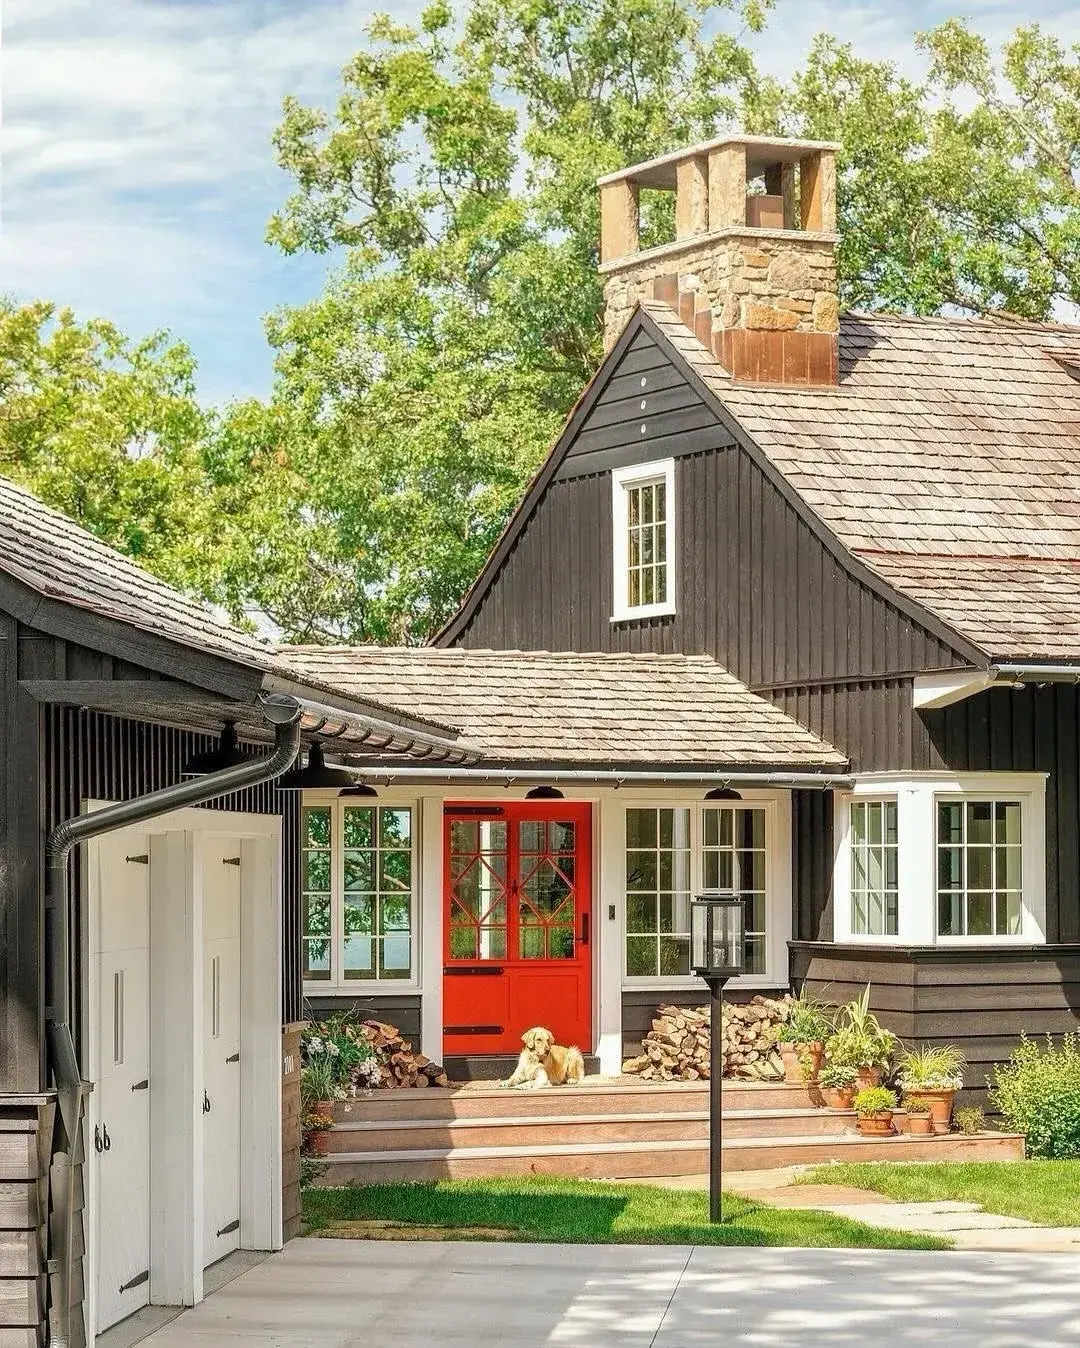
This cottage went dark on purpose. The walls are near black, the red double doors punch hard against them, and the natural shake roof sits pale above.
Dark hides year one completely. No orange, no stripes, no blotches. That is the attraction. Understand the contract before signing it.
Stain is not a one off. A semi transparent stain on cedar wants washing and recoating every 5 to 8 years, with sunny elevations first. Solid colour lasts a little longer but can lift at the butt edges where each shingle moves. Paint is worse on shingle, because it forms a skin that cracks at every joint. Use a penetrating product. Benjamin Moore Arborcoat and PPG ProLuxe sit around £60 to £95 for 5 litres in 2026, with Cabot and Osmo Country Colour in the same band.
Heat is the second cost. Dark walls run hotter in sun, move more, and stress the coating. Plan to do the south and west sides separately rather than waiting for the whole house. And use stainless fixings from the start, because rust tears on a dark wall show from the road. Simpson Strong-Tie stainless ring shanks in 32mm and 38mm are the standard ask.
New courses beside old never match at first
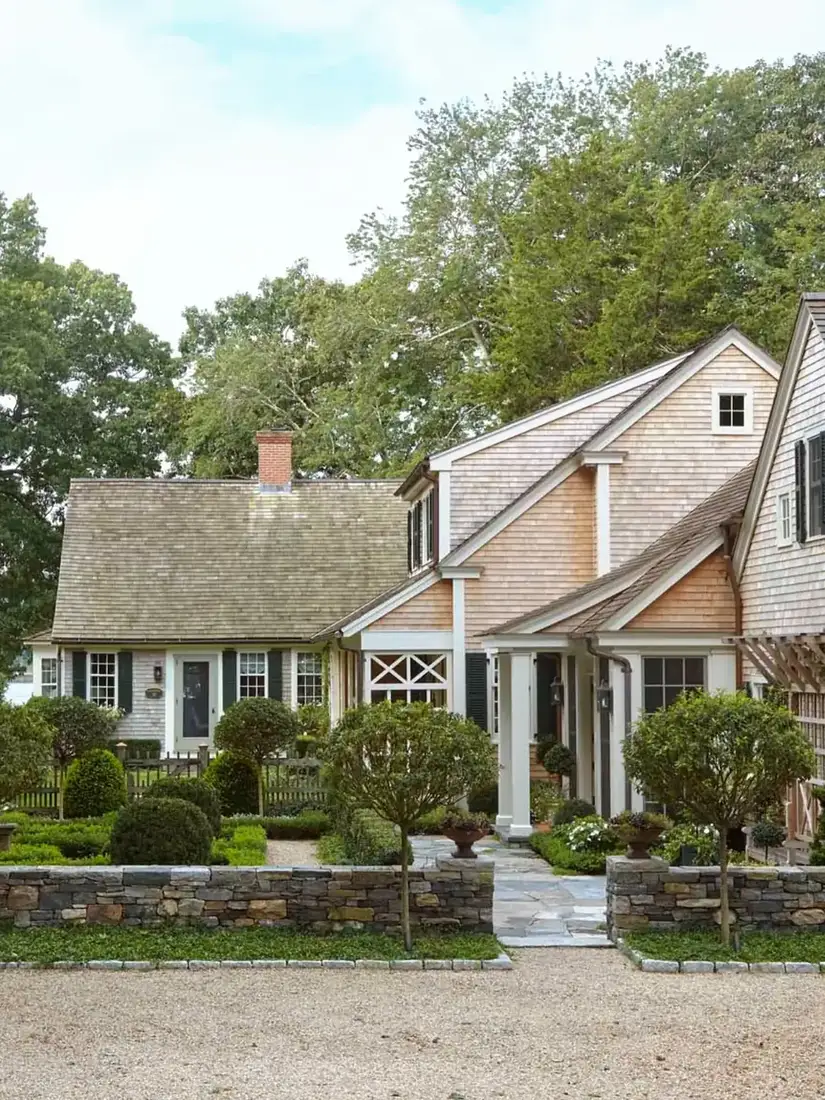
Look at the wall above that low stone boundary. The courses are pale honey, almost pink in places, while the roof slope above has already gone tan grey.
That mismatch is what a repair looks like for its first year. New cedar beside weathered cedar never blends on day one, which is why the spare bundle rule matters. Order three or four extra bundles from the same run, keep them dry in the garage, and patch from that stock. Cedar from a different mill five years later will read as a patch for another two years.
The stone work in this photo is doing honest work at the base. Stone where the building meets the ground takes splash and lets the shingle start higher and drier. Where there is no stone, hold the bottom course at least 150mm clear of soil, mulch, and gravel. Cedar wicks water upward from anything wet it touches, and the bottom course rots first in nine cases out of ten.
Keep the topiary off the wall too. Those clipped cones want to lean in within two summers. Cut them back so a hand passes between leaf and shingle, and the wall dries after rain.
A stained blue wall still needs the same base
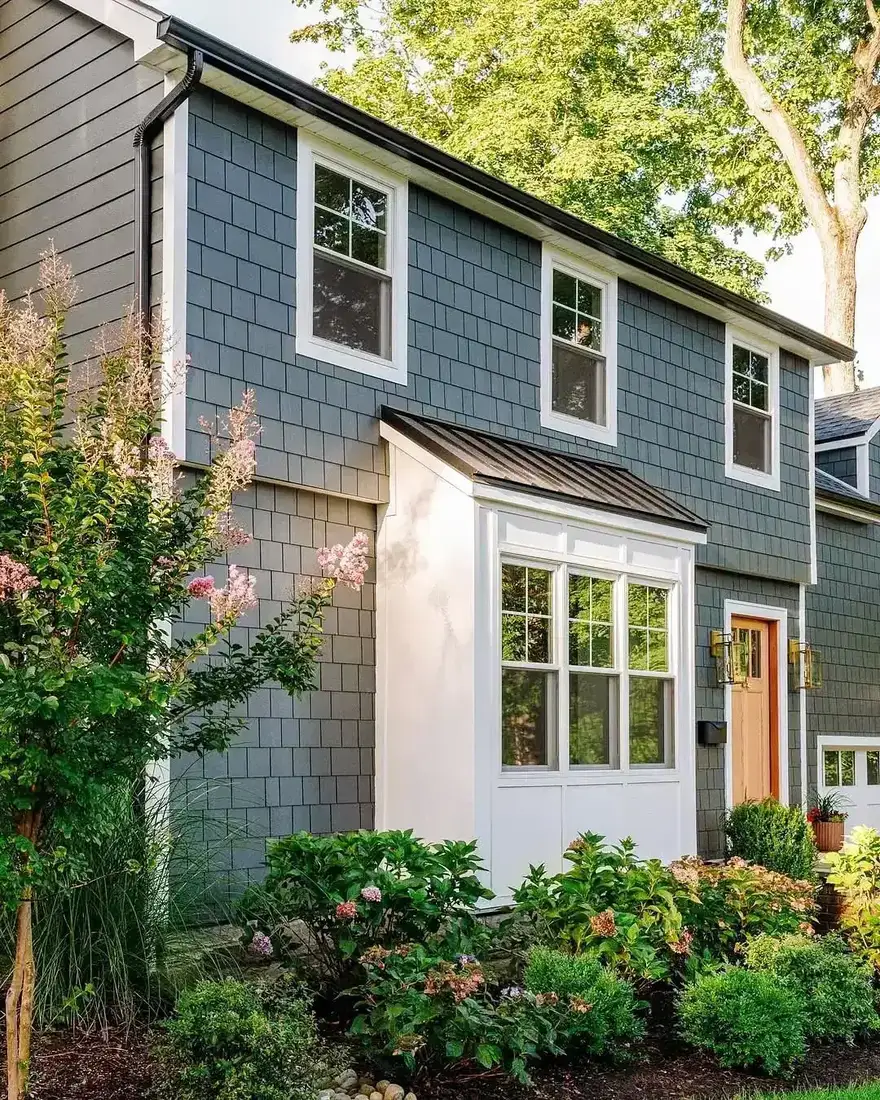
In that image the shingles are stained blue grey, not left to weather. The white bay below holds the elevation, the upper windows sit crisp, and the planting crowds the base.
Stain does not change the base rules. The bottom course still wants 150mm of clear air above soil and mulch, and shrubs still want about 450mm of setback so wind dries the wall. That bed in the photo is too full. Hydrangeas press against the courses, mulch has crept up, and the wall behind stays damp after every watering.
The bay itself is the pro job on this elevation. A projecting bay in shingle needs stepped flashing, a drip that throws water clear, and a metal cap that moves with the seasons. The white casing hides the joint, which is exactly why failures hide there too. If a bay like that is on your list, get a joiner who flashes weekly, not yearly.
For colour, that blue grey sits well because the trim stays white and singular. One strong wall colour plus white trim reads calm. Two or three competing trim colours on a small elevation read busy. Dulux Weathershield and Sadolin Superdec both carry suitable exterior blues at roughly £45 to £65 for 2.5 litres in 2026, with Farrow & Ball and Benjamin Moore exterior ranges above that band.
Woods keep the wall damp and green it up
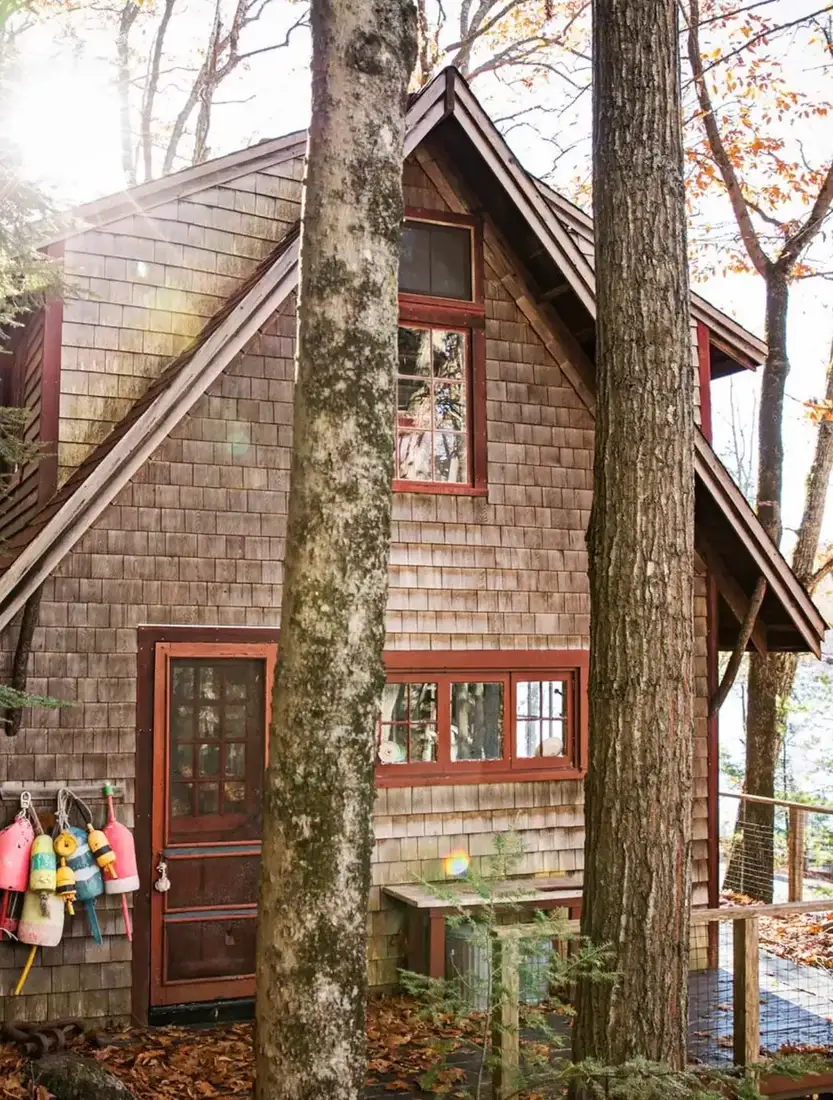
That lake cabin sits among trunks, with leaves on the roof edge and shade for most of the day. The shingles have gone brown grey and soft, with green starting where the sun never reaches.
Shade is the slowest weathering. Less ultraviolet means slower silvering, slower drying, and more algae. The fix is not chemical first. It is clearance. Cut back overhanging branches so sun reaches the wall for part of the day, rake leaves off the base, and pull woodpiles and buoys off the cladding. The lobster floats hung on that wall look charming and trap water exactly where the courses meet the trim.
Wash gently when green takes hold. A garden hose, a soft brush, and an oxygen bleach cleaner at around £12 to £20 in 2026, worked top down and rinsed well, lifts algae without tearing fibres. Never use a pressure washer on cedar. It furs the surface, opens the grain, and the wall then holds dirt and water from that season onward. The damage does not sand out cleanly.
Red trim like that needs watching in shade too. It holds moisture at the joint longer than white, so keep the sealant line sound and the back primed.
The side passage shows the clearance rule
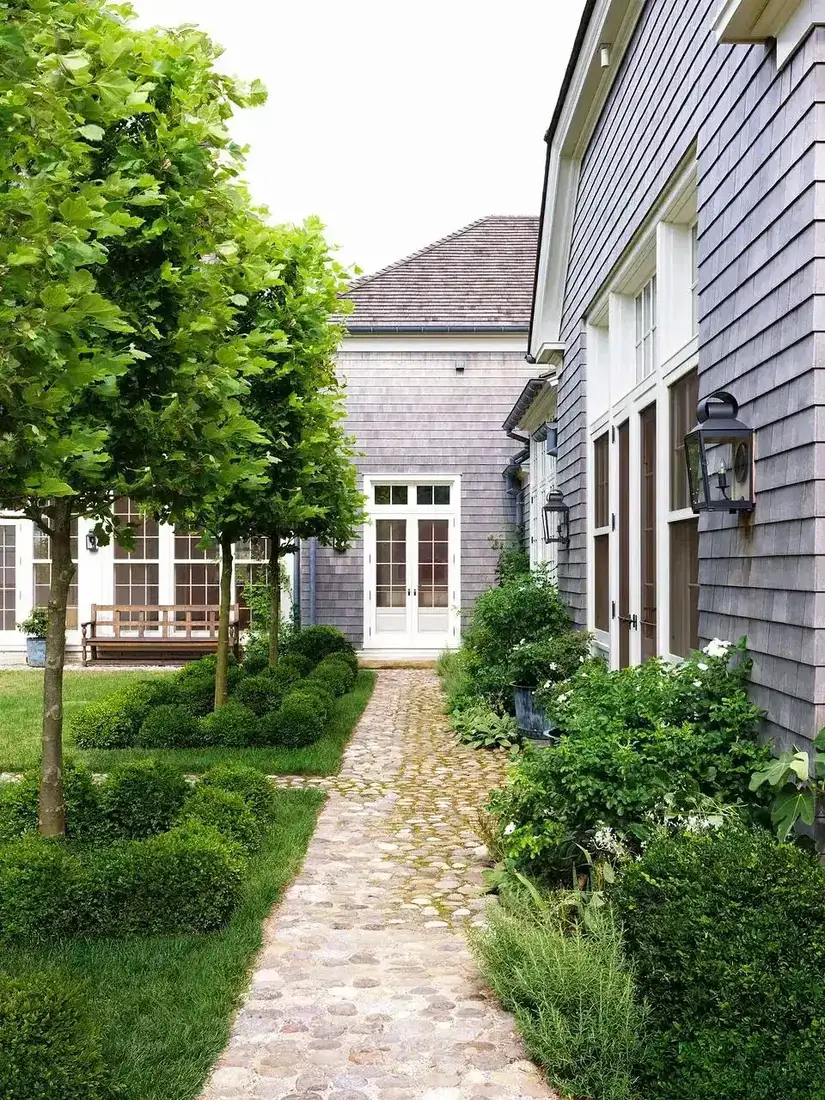
This narrow passage is the best detail lesson on the page. The wall is fully silvered, the cobbled path runs clean below, and planting sits in a disciplined line to one side.
That path is what 150mm of clearance looks like when done well. Hard paving at the base stops soil splash, lets air move, and gives a place to stand with a brush for the biennial wash. Soil or bark piled to the courses would wick water upward and darken the bottom two courses within a winter.
The one detail to copy is the gap between leaf and wall. Those pleached trees stand clear, the box stays low, and the lanterns mount on standoffs rather than tight to the shingle. Every fixing through shingle should be stainless. Hot dip galvanised nails at £6 to £9 per kg in 2026 suit inland joinery, stainless 304 ring shanks at £18 to £28 per kg suit most shingle, and marine grade 316 at £28 to £40 per kg suits sites within sight of salt water. Maze Nails and Simpson Strong-Tie list both grades, with Owlett-Jaton stocking standard lengths in the UK.
Below that path, check the ventilation at the base. Air must enter behind the cladding and leave at the top. Block the bottom with soil and the rainscreen stops working.
Roses want to lean, so give them their own frame
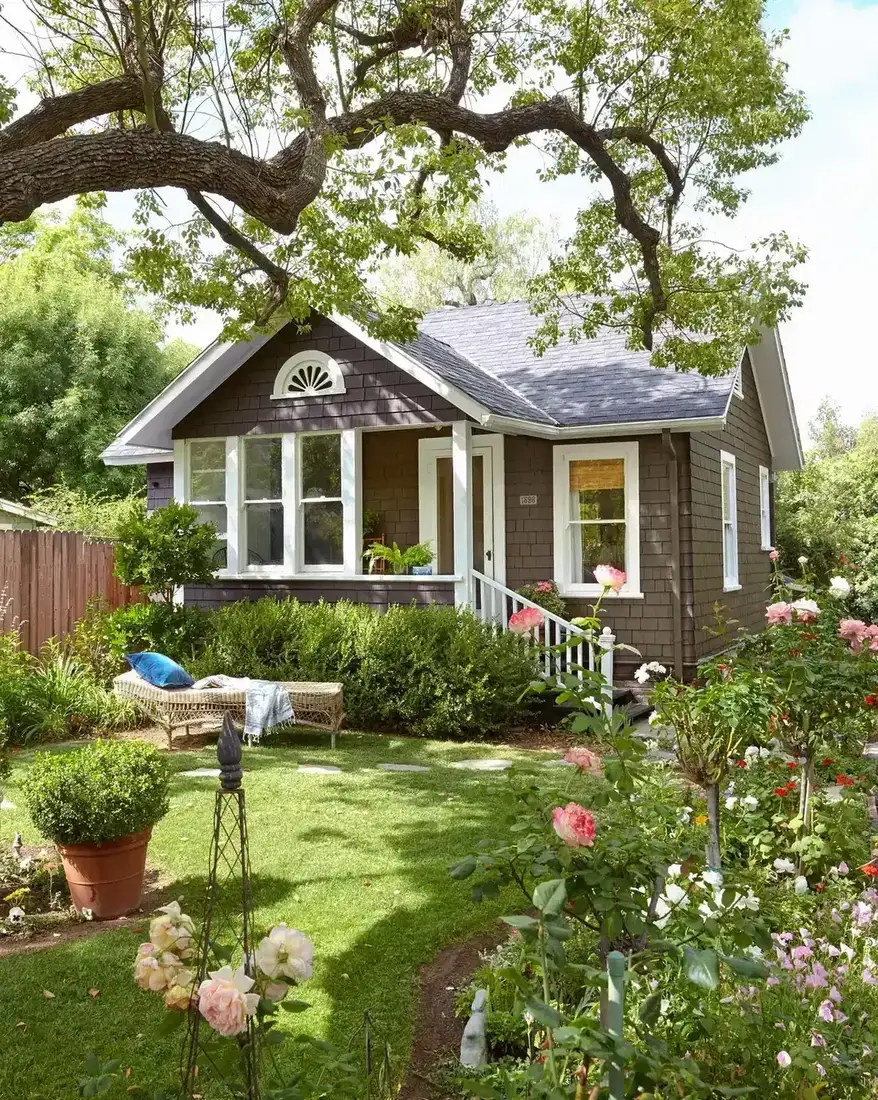
The bungalow in that photo wears mid weathered brown shingles, white porch posts, and a rose garden that is already reaching for the wall.
Roses and cedar suit each other visually and argue physically. Canes scratch the courses, leaves hold rain against the butts, and the wall behind a full border dries a day later than the open wall. The answer is distance plus structure. Hold the border about 450mm off the wall, mulch low so it stays below the 150mm clearance line, and put climbers on a freestanding trellis that stands clear of the shingle rather than screwing wires to the courses.
In this photo the lawn and the potted box do the right thing near the house. Low, movable, and clear of the cladding. The tall roses belong a step farther out. Prune for air, not just shape, so wind passes behind the stems.
Wash this kind of wall every few years with a soft brush and water. No machines, no wire brushes, no harsh bleach that strips the silver. The brown in the image is the middle of the timeline, roughly year two to three on the sunny side. Leave it to go silver. It will, if air reaches it.
Full silver is what patience buys
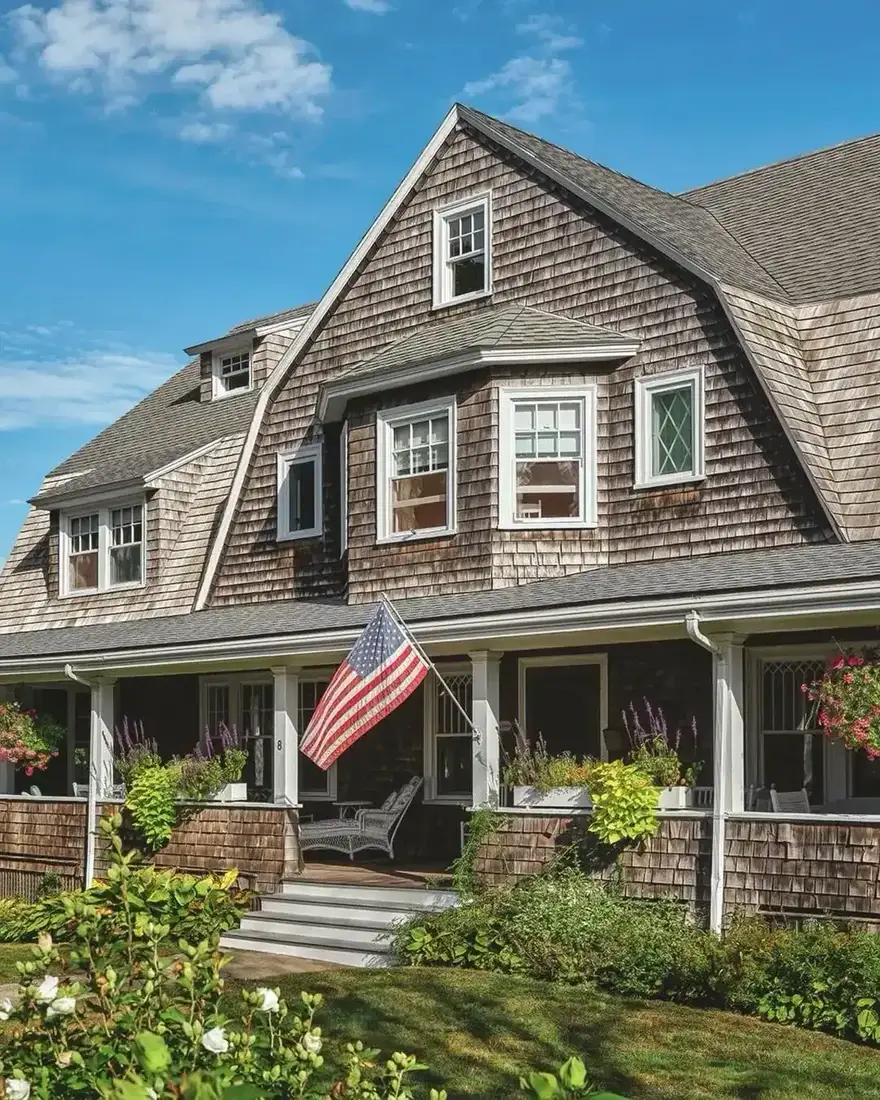
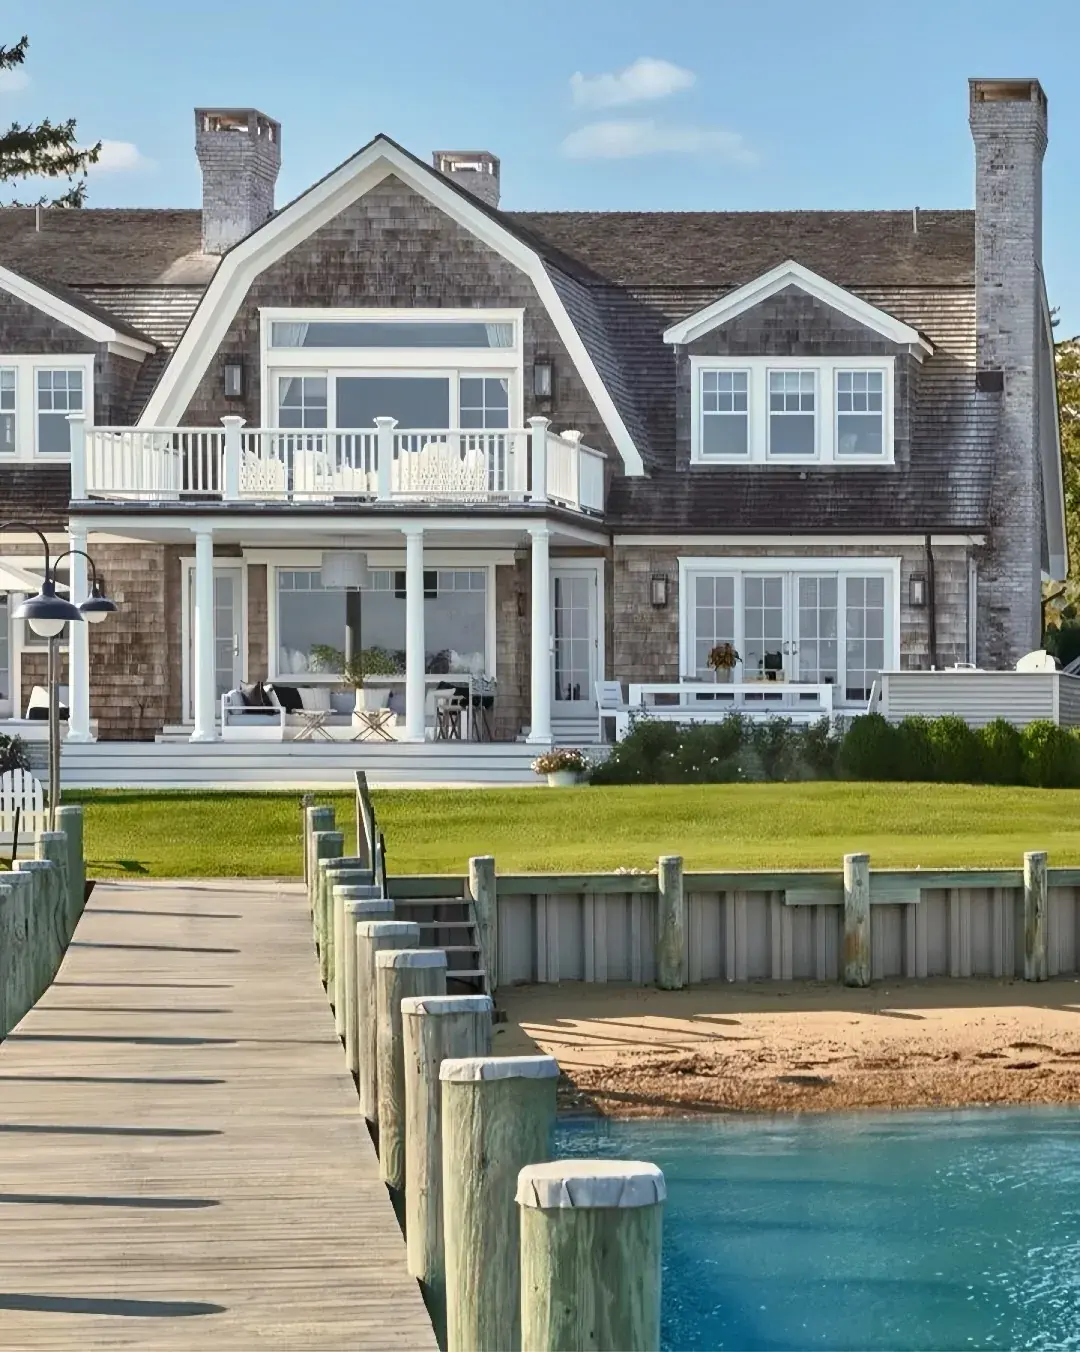
That gambrel is the payoff. The courses read as one even grey, the white trim draws every opening, and the deep porch keeps the ground floor dry enough to hold its tone.
This is years three to five on the sunny faces. The south and west went first, the shaded courses followed, and the whole now looks intentional rather than patchy. From the kerb the texture does the work. Up close the courses still vary, which is correct for a timber wall.
The porch is doing more than looking pretty. A deep overhang keeps rain off the lower courses, which is why the wall under it weathers slower and stays cleaner at the base. Do not box that benefit away with lattice and storage. Air under the porch dries the wall, and access lets you inspect the bottom course yearly for soft spots.
Check the fixings on a wall this age. No rust tears, no dropped courses, no nail heads pushing. That is stainless doing its job. Ordinary steel would have wept brown down that silver by year two, and the stain would be in the timber rather than on it. When specifying, write stainless on the drawings before the first course goes up. Changing it after means pulling courses.
Honey gold is new, not faulty
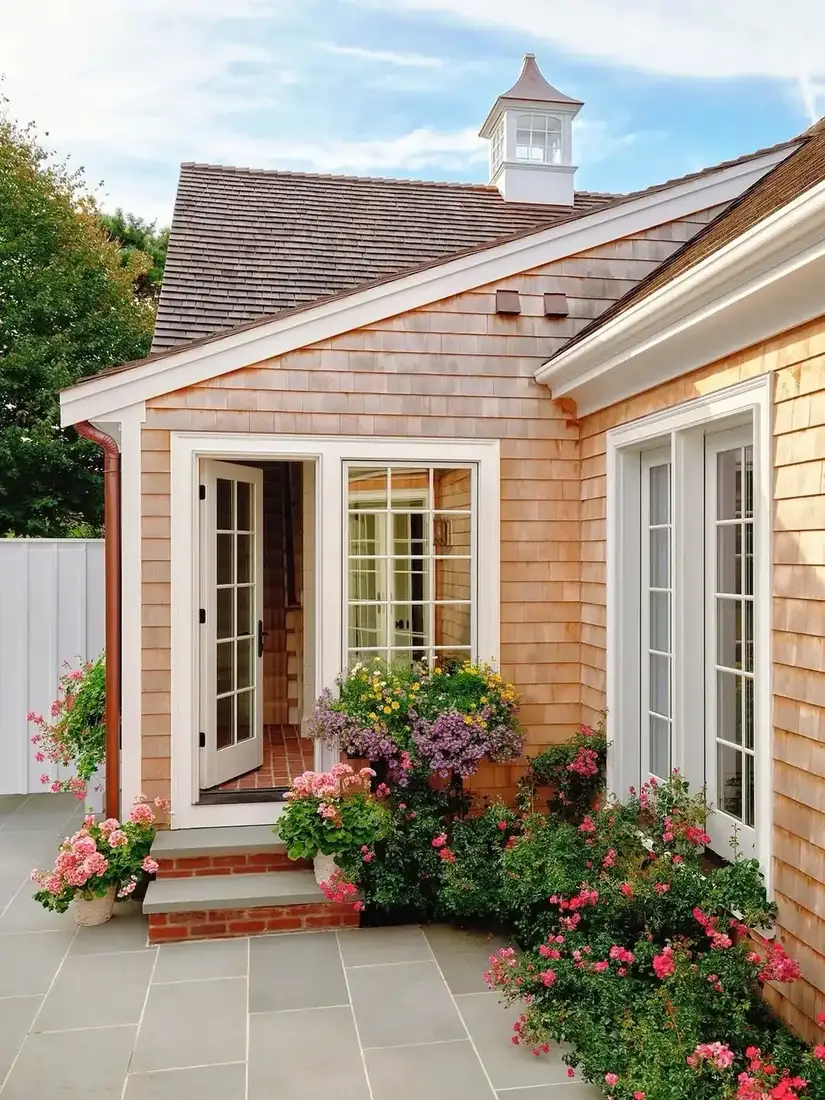
The cottage in the last image is the newest cedar on the page. The walls glow honey orange, the cupola sits white above, and copper gutters run brown at the corner.
New owners often read that orange as a fault and reach for stain within months. Do not. The honey stage lasts roughly one season, then streaking starts, then tan, then silver from year two onward to year five. The wall in this photo is behaving exactly as western red cedar behaves.
If waiting feels impossible, use bleaching oil rather than solid stain. It carries a little grey pigment and speeds the silvering instead of coating over it, so sunny and shaded walls even out in weeks. It is not protection, and it does not replace stainless nails, a ventilated gap, and 150mm of base clearance. Recoat lightly every few years if even tone matters more than bare weathering.
That copper downpipe is the right metal beside new cedar. It will go brown, then dark, then green over a decade, while the shingle goes honey, then tan, then silver. Both change, and neither asks for paint. Keep roses in pots by the door as shown, not planted against the courses, and the base will stay dry enough to silver cleanly.
What to buy once and when to recoat
Bare cedar asks for detailing rather than product, while stained cedar asks for a calendar. The table below sets the two paths side by side so the choice is clear before the scaffold comes down.
| Path | Colour in year one | Even tone | Recoat | 2026 price band |
|---|---|---|---|---|
| Bare, left to silver | Honey, then streaky orange | No, until years 3 to 5 | Wash only | Cleaner £12 to £20, brush owned |
| Bleaching oil | Soft grey in weeks | Mostly, both faces | Light top up every 3 to 4 years | £55 to £85 for 5 litres |
| Semi transparent stain | Chosen colour, even | Yes | Wash and recoat every 5 to 8 years | £60 to £95 for 5 litres |
Fixings and base details belong in writing on the job sheet, not in memory. Stainless 304 inland and 316 near the sea, 32mm and 38mm ring shanks for typical courses, a ventilated gap open top and bottom, and 150mm of clear air at the base with planting held about 450mm back.
Frequently Asked Questions
How soon will fresh cedar lose its orange tone?
New boards glow honey for a single season, then stripe and darken through the first year. Sunny faces turn tan in the second year and drift toward silver between the second and fifth years. Shaded walls stay darker longer, which is expected.
Do cedar walls need a coating to survive?
No. The timber is durable bare, and longevity comes from metal choice, airflow behind the courses, and clearance at the ground. Coatings alter colour and evenness, while stainless fixings plus a drained cavity deliver the lifespan.
Which nails suit shingle in wet or coastal air?
Stainless ring shanks in standard 32mm and 38mm lengths. Grade 304 serves most inland sites, while grade 316 serves plots within sight of salt water. Plain steel and thinly coated nails bleed brown tears that soak into silvered timber.
Why is the shaded side still patchy?
Less sun means slower drying and slower silvering, plus green film where foliage crowds the courses. Pull shrubs forward, prune overhead limbs, and soft wash with hose, brush, and oxygen bleach. Pressure machines fur the grain and worsen later soiling.
What shortcut gives an even grey faster?
Bleaching oil with a little grey pigment, which steers natural silvering to arrive in weeks rather than years. It is a tint, not a shield, so cavity ventilation and base clearance still carry the work. Top up lightly if uniform tone matters.
How should planting sit near cedar?
Keep beds low, mulch below the 150mm clearance line, and hold stems about 450mm off the courses so wind dries the wall. Climbers belong on a freestanding frame, pots can stand nearer since they move for washing and checks.
In order
- Keep trim sections fine and consistent; heavy trim is the usual mistake.
- Decide corners deliberately: woven for tradition, boarded for budget.
- Use white or off-white trim, never a mid-tone that matches the shingle.
- Prime and paint trim on all faces before the shingles butt into it.
- Never pressure wash; use a soft brush and a biocide.
- Let bare cedar silver over 2 to 5 years; use bleaching oil only for an even grey sooner.
- Specify stainless nails, a ventilated gap, 150mm base clearance, and 450mm planting setback.
This article may contain affiliate links. We may earn a commission at no extra cost to you.