— DisclosureThis article may contain affiliate links. We may earn a commission at no extra cost to you.
We sometimes earn a small commission when you buy through our links. It costs you nothing extra and helps us keep writing. Read our full policy →
The tile you choose for your bathroom is the decision that lasts longest.
Paint can be changed in a weekend. Fixtures can be replaced in an afternoon. Even the vanity can be swapped with a wrench and a second pair of hands. But the tile — once it is set in mortar and grouted into permanence — stays. For years. For decades. Possibly for the entire life of the bathroom.
This is why tile selection deserves more thought, more samples, and more time than any other bathroom decision. Not less. The permanence of tile means the emotional experience it creates is the emotional experience you will live with every morning and every evening for years to come.
A tile that feels cold underfoot will make every barefoot morning start with a flinch. A tile that catches light beautifully will make every evening bathroom visit feel like a small luxury. A tile with handmade irregularity will make the room feel alive. A tile with machine perfection will make it feel manufactured.
These 29 tile ideas will help you choose surfaces that make you want to touch them.
Part 1: Floor Tiles — The Foundation Underfoot
The floor is where tile does its most intimate work. It is the surface your bare feet meet first thing in the morning. It is the surface you kneel on, stand on, and walk across hundreds of times a day. The floor tile sets the room’s temperature — literally and emotionally.
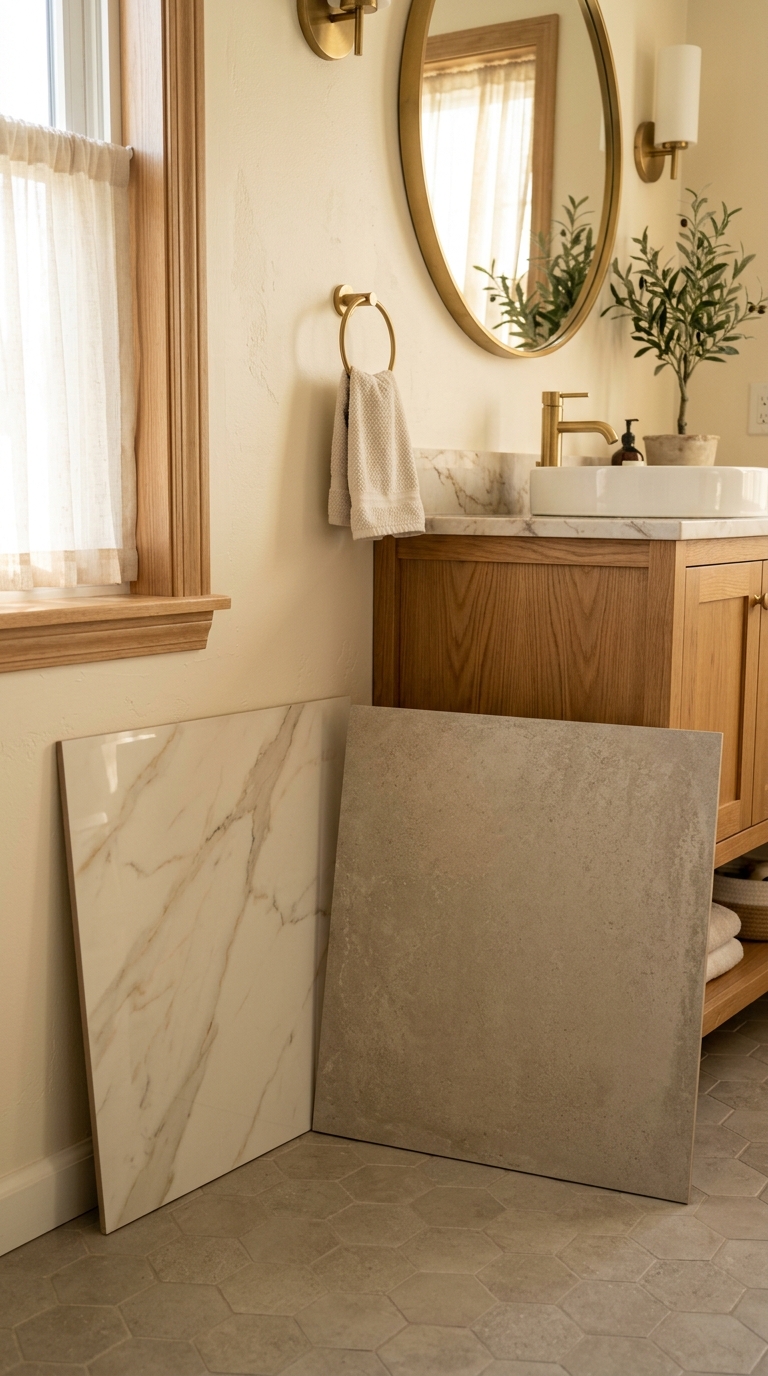
1. Limestone-Look Porcelain — Warmth Without Vulnerability
Genuine limestone is beautiful but porous — it absorbs water, stains easily, and requires regular sealing. Limestone-look porcelain captures every quality of natural limestone — the warm cream base, the subtle tonal variation, the soft matte texture — without any of the vulnerability.
On a bathroom floor, limestone-look porcelain in warm ivory or warm sand creates a surface that reads as natural stone from standing height. The colour variation between tiles is gentle enough to feel organic without creating visual chaos. The matte finish provides slip resistance that glossy tiles cannot match.
Choose large-format tiles (600mm x 600mm or larger) for fewer grout lines and a more seamless floor surface. Fewer grout lines means less visual interruption and easier cleaning.
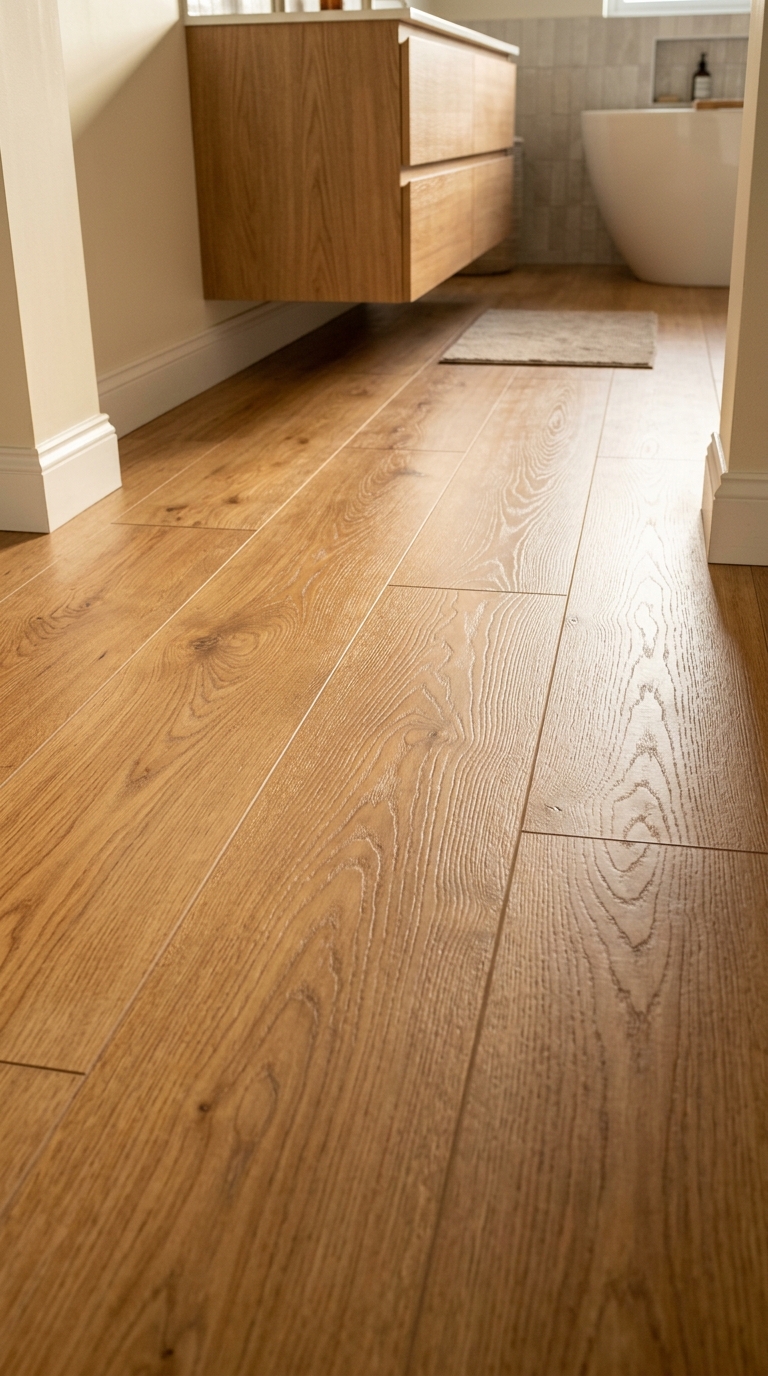
2. Warm Oak Wood-Look Tiles — The Warmth of Wood, the Durability of Porcelain
Wood-look porcelain tiles have reached a level of realism that makes them virtually indistinguishable from genuine hardwood at walking height. The grain patterns, the texture underfoot, the warm honey tones — all captured in porcelain that handles water without warping, scratching without denting, and lasting decades without refinishing.
On a bathroom floor, wood-look tiles in warm oak create the emotional warmth of a hardwood floor with none of hardwood’s vulnerability to moisture. The planks run lengthwise along the room, elongating the space and creating a visual flow that draws the eye forward.
The chevron pattern takes this further — the angled planks create a directional energy that a straight-laid floor cannot achieve. The bathroom feels more dynamic, more considered, more designed.
![]()
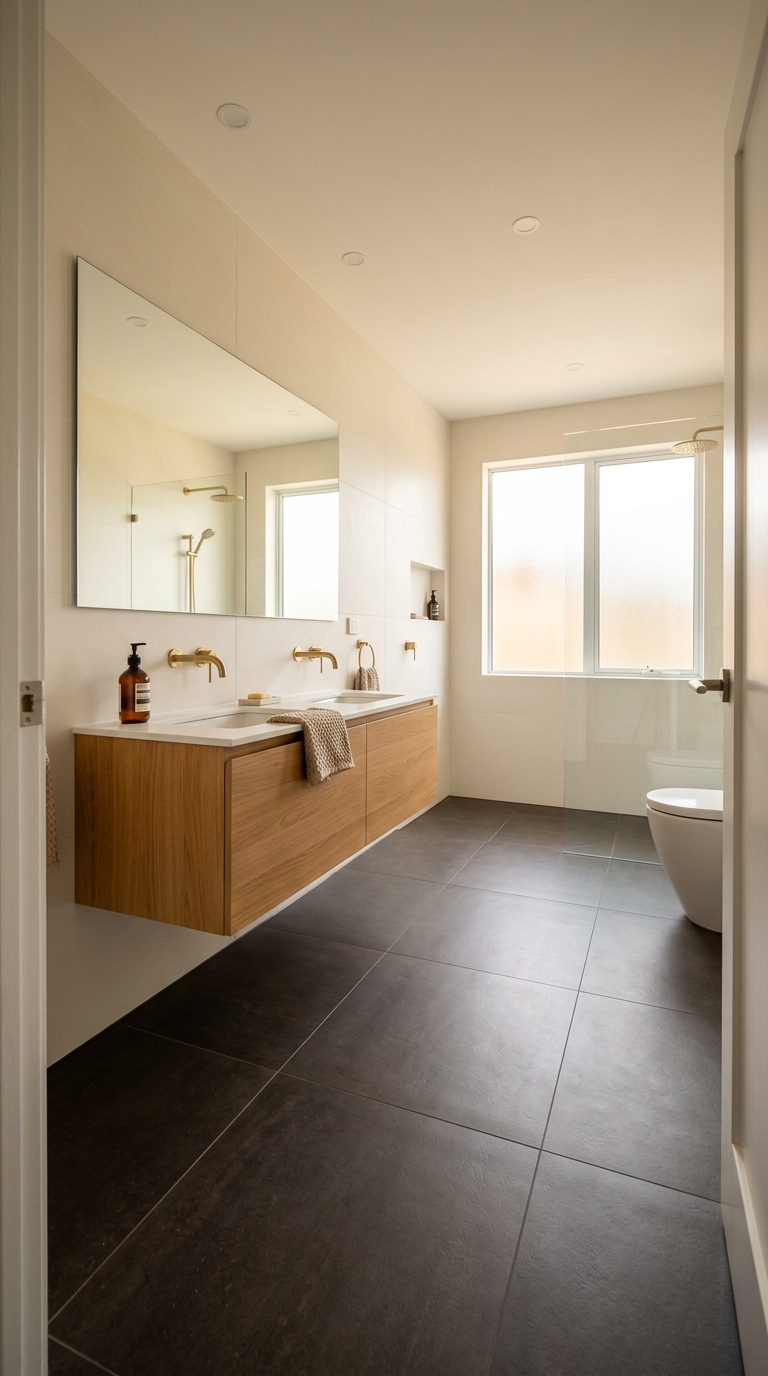
3. Dark Floor, Light Walls — The Grounding Principle
The most reliable floor-wall relationship in bathroom design: darker floor, lighter walls. This arrangement mimics natural light distribution — brighter above, darker below — and the eye reads it as inherently stable and calm.
Dark floor tiles in warm charcoal, deep greige, or warm dark brown anchor the room from below. Lighter wall tiles in warm ivory, soft cream, or warm white reflect light and maintain a sense of spaciousness above. The contrast creates a visual hierarchy that organises the room without any effort from the occupant.
This principle works in every bathroom size. In large bathrooms, the contrast adds definition. In small bathrooms, the dark floor grounds while the light walls expand.
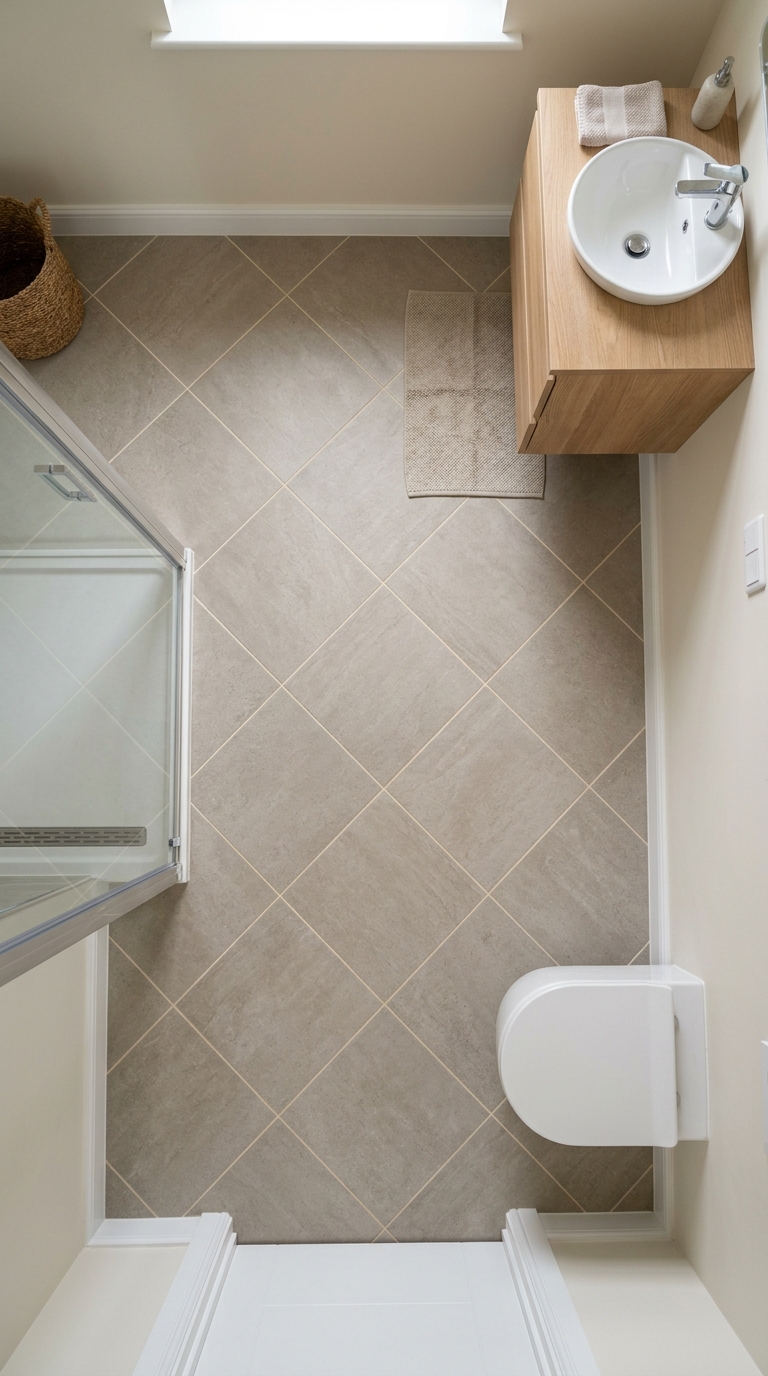
4. Diagonal Floor Layout — The Space Illusion
Laying floor tiles on the diagonal — at 45 degrees to the walls — creates a visual effect that makes the floor appear larger than it actually is. The diagonal lines extend toward the corners of the room rather than following the walls, and the eye reads the extended diagonals as expanded space.
This illusion is most powerful in small bathrooms where every square centimetre of perceived space matters. A small bathroom with diagonal floor tiles feels noticeably more spacious than the same bathroom with tiles laid parallel to the walls.
The diagonal also adds visual interest to simple square tiles. A plain warm grey porcelain that looks ordinary in a straight layout becomes dynamic and intentional on the diagonal.
Part 2: Wall Tiles — The Surfaces You See
Wall tiles occupy more visual territory than floor tiles. They surround you. They reflect light. They are the backdrop against which you see yourself in the mirror. The right wall tile transforms the bathroom from a tiled room into an environment.
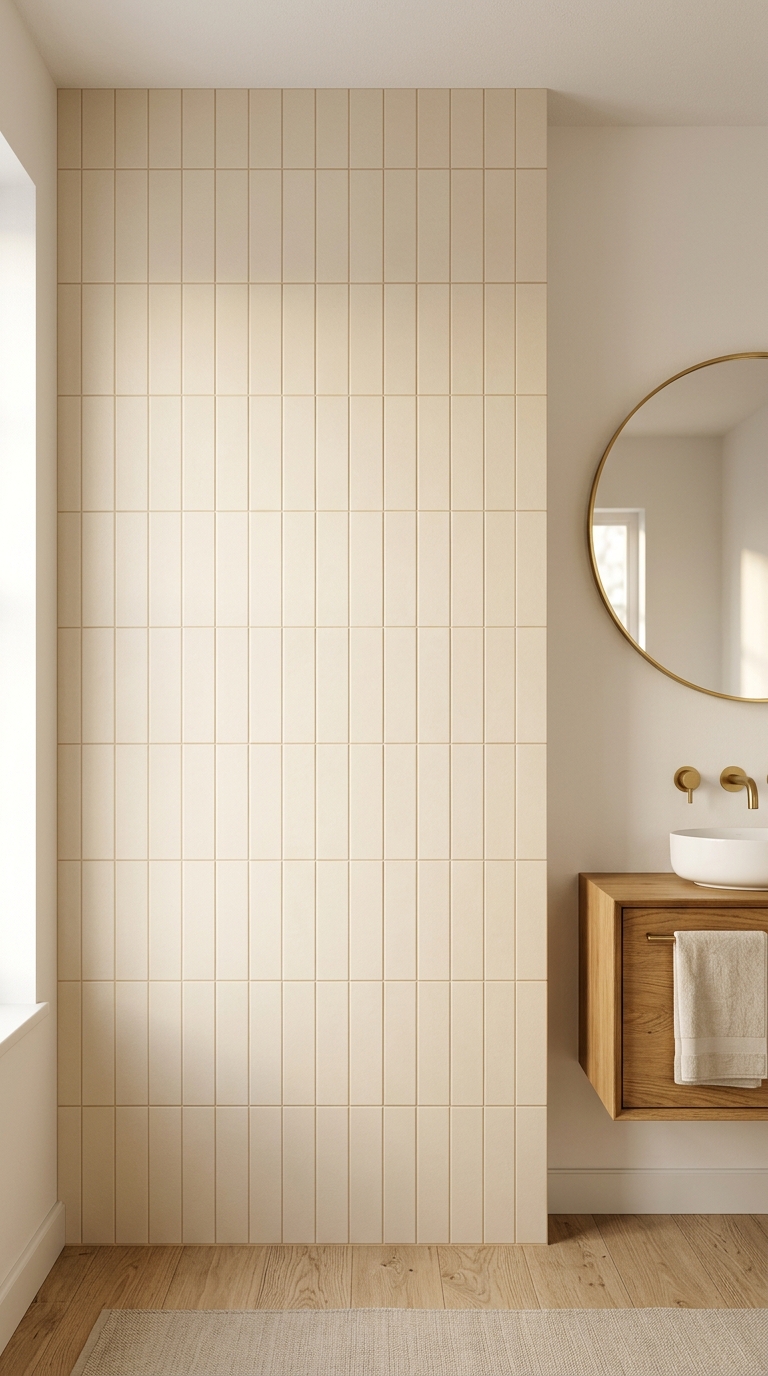
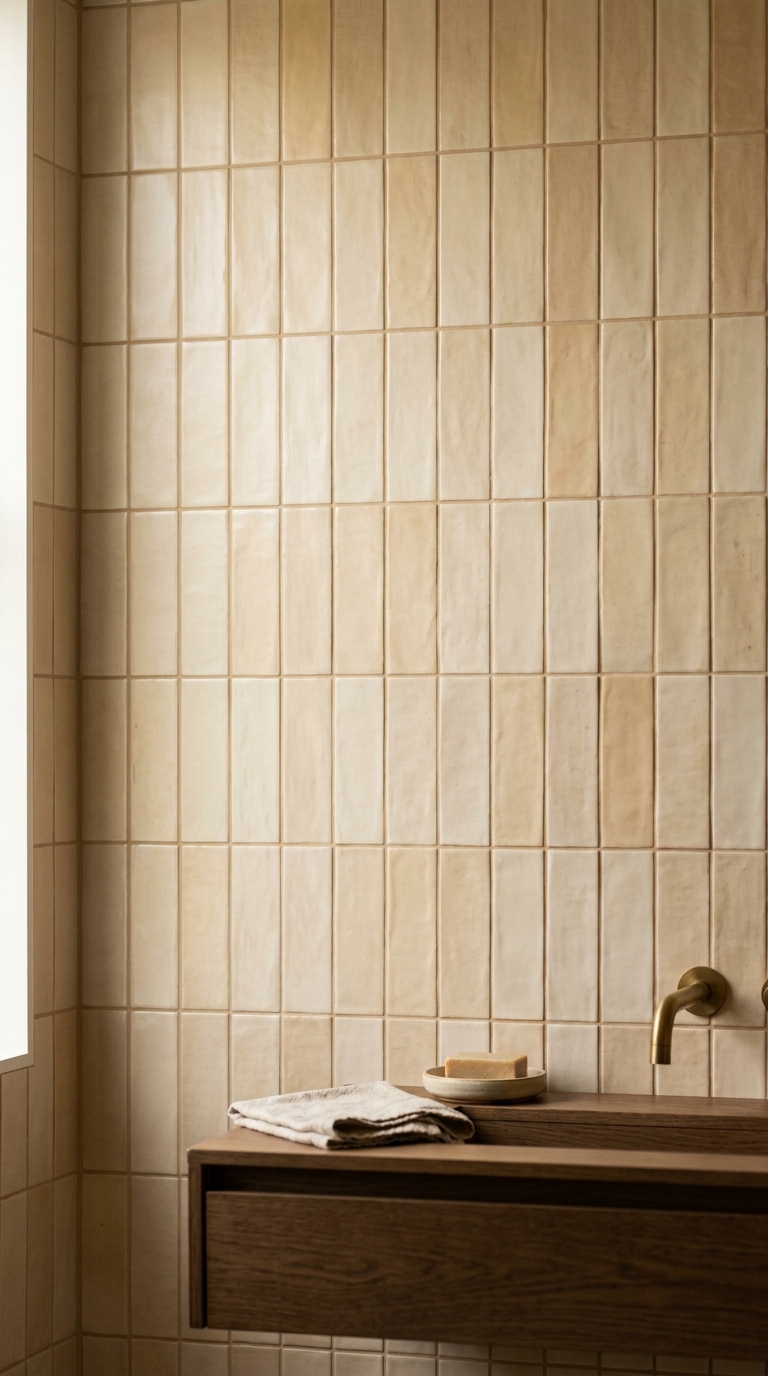
5. Vertical Stack Bond — The Height Maker
Subway tiles laid in a vertical stack bond — stacked directly on top of each other rather than offset in the traditional running bond — draw the eye upward with an insistence that horizontal layouts cannot match.
The vertical lines create a visual lift that makes ceilings feel higher and rooms feel taller. In a bathroom with standard 2.4-metre ceilings, vertical stack bond tiles add approximately 15 to 20 centimetres of perceived height. In a bathroom with vaulted or raked ceilings, the effect is even more dramatic.
Vertical stack bond also modernises the subway tile instantly. The traditional running bond reads as classic and timeless. The vertical stack reads as contemporary and considered.
6. Full Wall Coverage — The Immersive Envelope
Tiling a bathroom wall from floor to ceiling — no painted surface, no interruption, no transition — creates an immersive envelope that transforms the room from a tiled bathroom into a cohesive space.
The full-height tile wall reflects light uniformly from floor to ceiling. The absence of a painted section at the top (where wall tile traditionally stops at 1.2 or 1.5 metres) means the eye never encounters a material transition. The room reads as a single designed surface rather than a tiled lower half and a painted upper half.
Full-height tiling costs more in materials and labour, but the visual result — a bathroom that feels complete, considered, and permanent — justifies the investment for anyone planning to live with the bathroom for more than a few years.
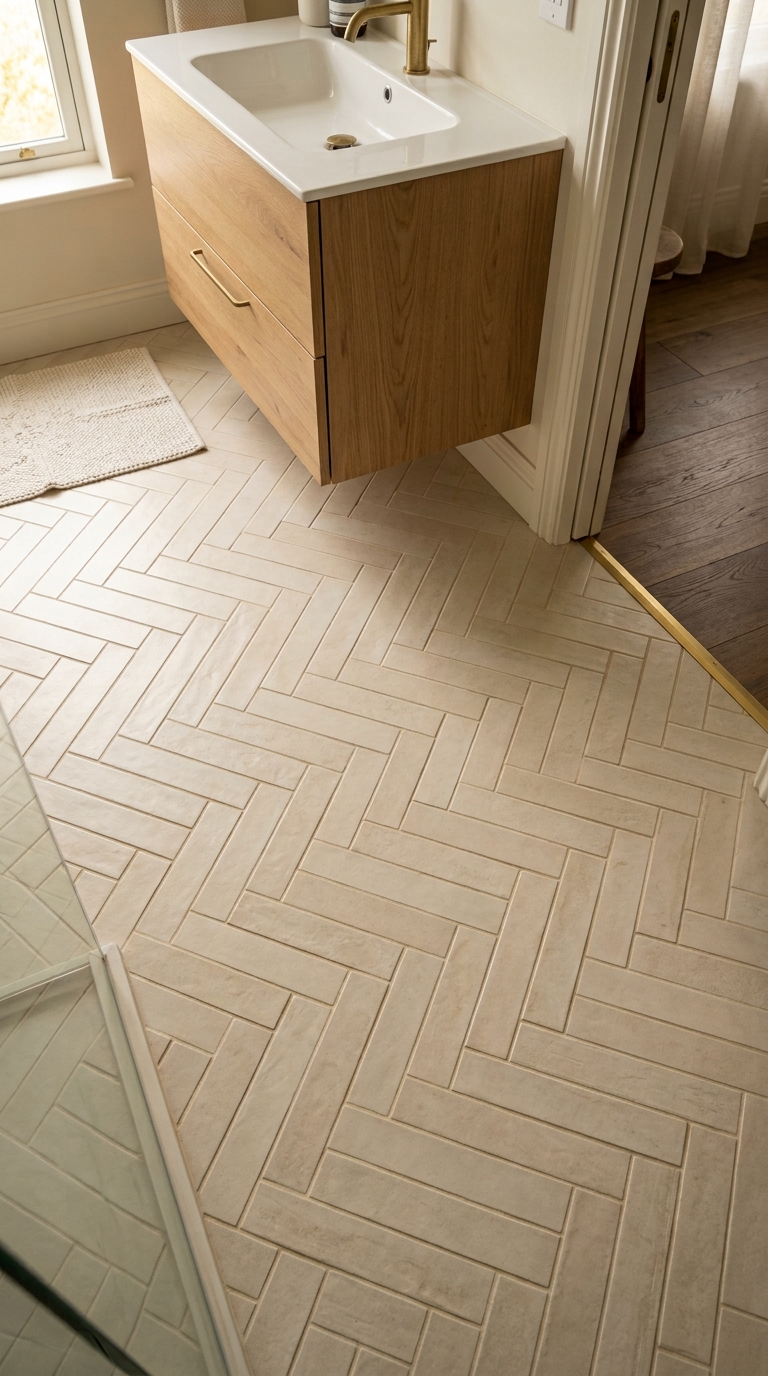
7. Ivory Porcelain Herringbone — Pattern Without Chaos
The herringbone pattern transforms rectangular tiles into a surface with movement, direction, and visual richness that no straight layout can achieve. The interlocking V-pattern catches light at different angles across the surface, creating subtle shadows and highlights that shift as you move through the room.
Ivory porcelain in herringbone is particularly effective because the warm neutral colour allows the pattern to speak without competing with colour. The herringbone provides all the visual interest. The ivory provides all the warmth. Together, they create a wall or floor surface that feels both dynamic and calm.
Use herringbone on a single feature wall — behind the vanity or in the shower — rather than on every surface. One herringbone wall among three straight-laid walls creates a focal point without visual overload.

8. The Tile Continuity Principle — Floor to Wall
One of the most sophisticated bathroom tile strategies: using the same tile on both floor and wall. When the floor tile extends up the wall (or the wall tile extends down to the floor), the transition between surfaces disappears. The room becomes a single continuous envelope.
This continuity is most effective with large-format tiles in a neutral tone. The same 600mm x 600mm warm ivory porcelain on floor and lower walls creates a seamless envelope that makes small bathrooms feel significantly larger — the absence of a visible floor-wall transition removes the visual boundary that normally closes a small room in.
The continuity also simplifies the room’s material palette. One tile instead of two means less visual complexity, fewer decisions, and a more cohesive result.
Part 3: Shower Tiles — The Focal Zone
The shower is the bathroom’s most visually concentrated area. It is enclosed (often glass-fronted), well-lit, and viewed from outside the enclosure as a designed display. The shower tile deserves more attention than any other surface in the room.
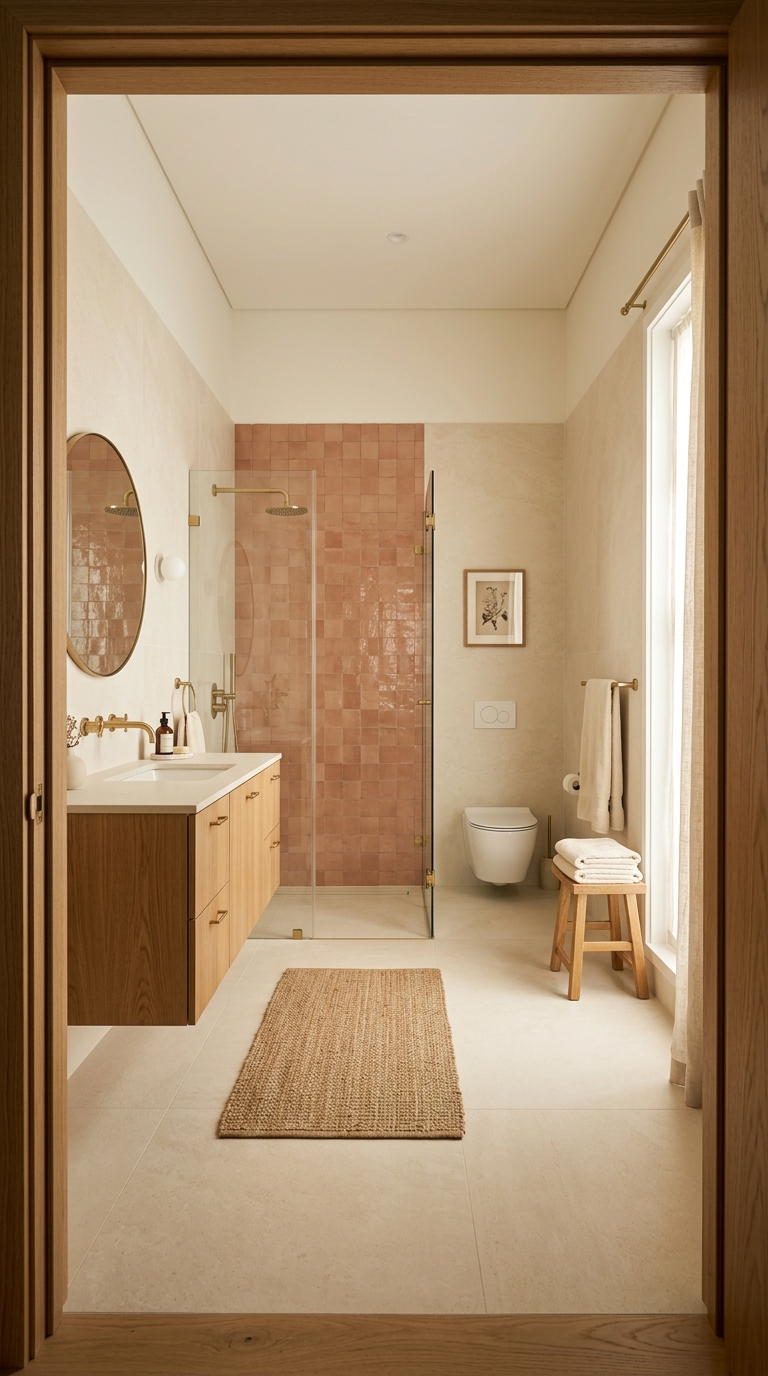
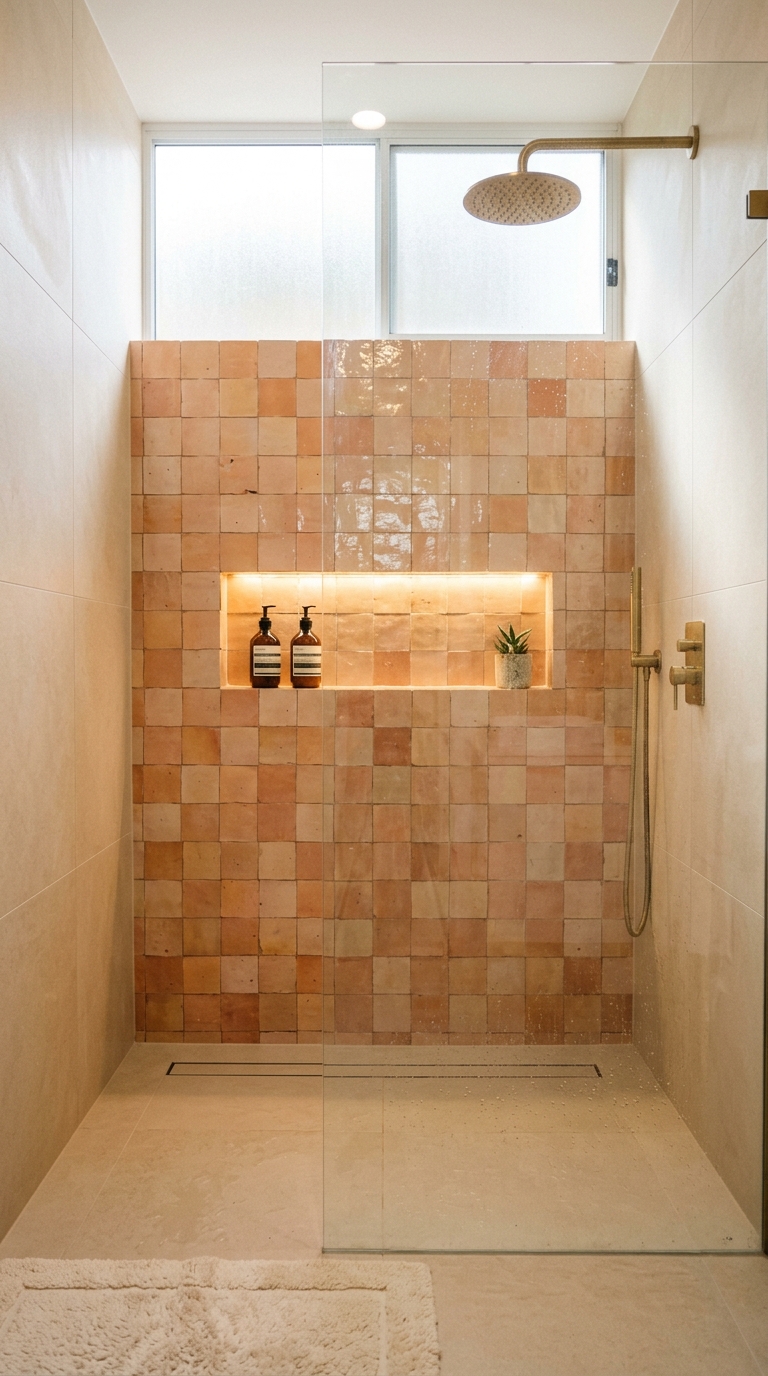
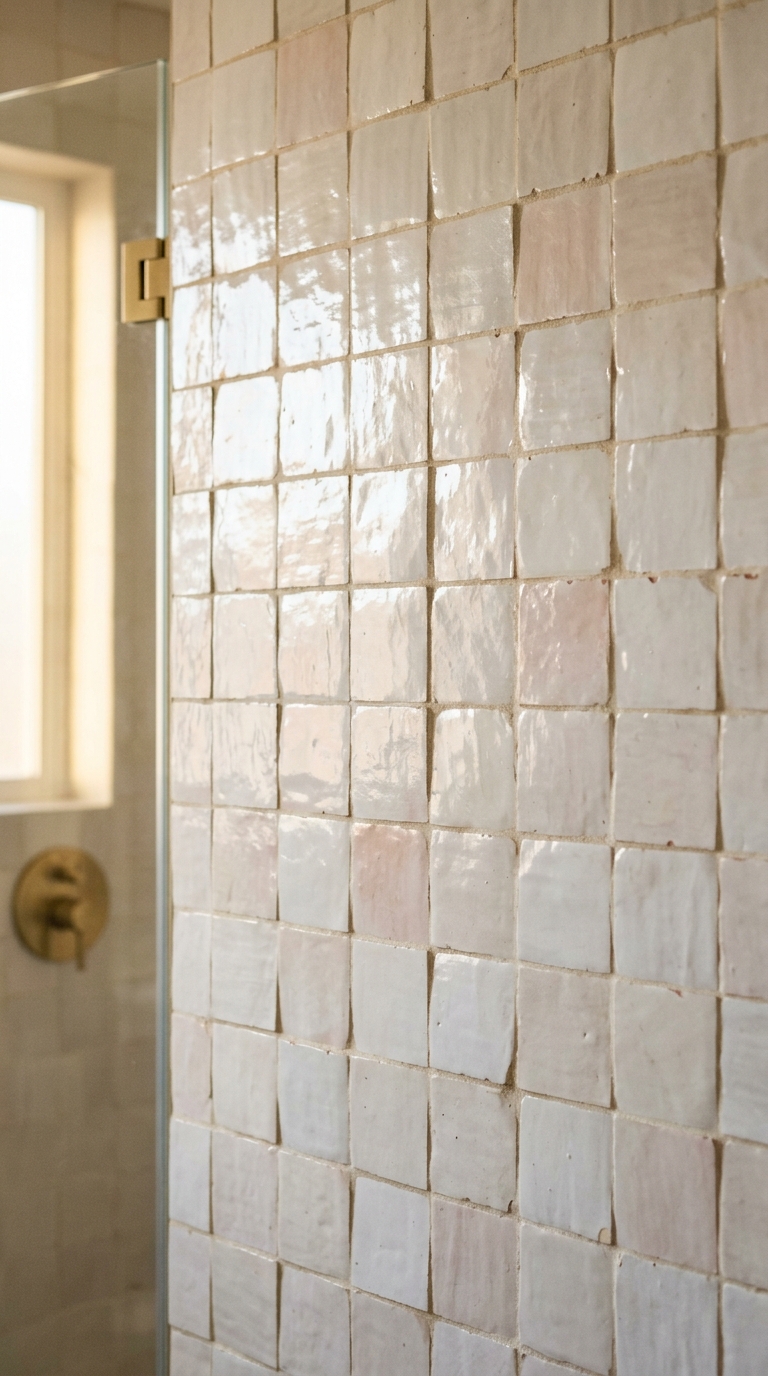
9. Zellige Feature Wall — The Handmade Shimmer
Zellige tiles are hand-pressed, hand-cut, and hand-glazed Moroccan clay tiles. Every tile is slightly different in thickness, colour, and surface texture. When installed together, the collective irregularity creates a surface that shimmers — light catches each tile differently, and the wall appears to breathe with subtle movement.
A zellige feature wall in the shower — behind the rainfall head or on the back wall — transforms the shower from a functional enclosure into the bathroom’s most captivating surface. The handmade quality introduces an organic warmth that no machine-made tile can replicate.
Choose warm ivory, soft cream, or muted sage zellige. These colours allow the handmade texture to dominate the visual experience. Brighter colours compete with the irregularity and reduce its impact.
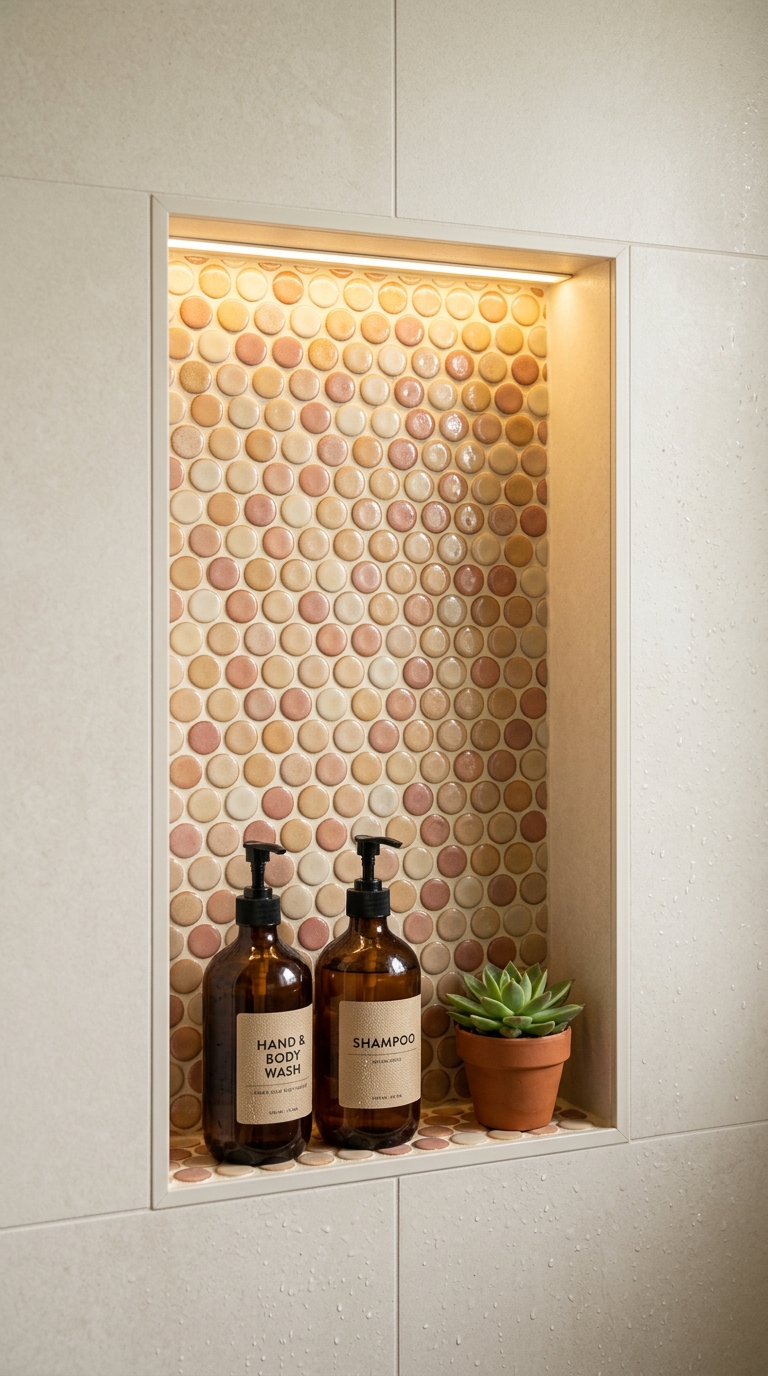
10. Penny Mosaics in the Niche — The jewellery Detail
The shower niche — the recessed shelf built into the shower wall for shampoo and soap — is the bathroom’s smallest designed surface and often its most visually interesting. Tiling the niche interior with penny round mosaics creates a jewellery-like accent that rewards close attention.
Penny mosaics in warm white, soft cream, or warm brass-toned create a curved contrast to the straight lines of surrounding wall tiles. The circular shapes soften the niche’s rectangular geometry and create a pocket of visual texture that draws the eye.
The small scale of penny mosaics means the niche becomes a detail — something you notice and appreciate up close — rather than a statement that competes with larger tile surfaces.
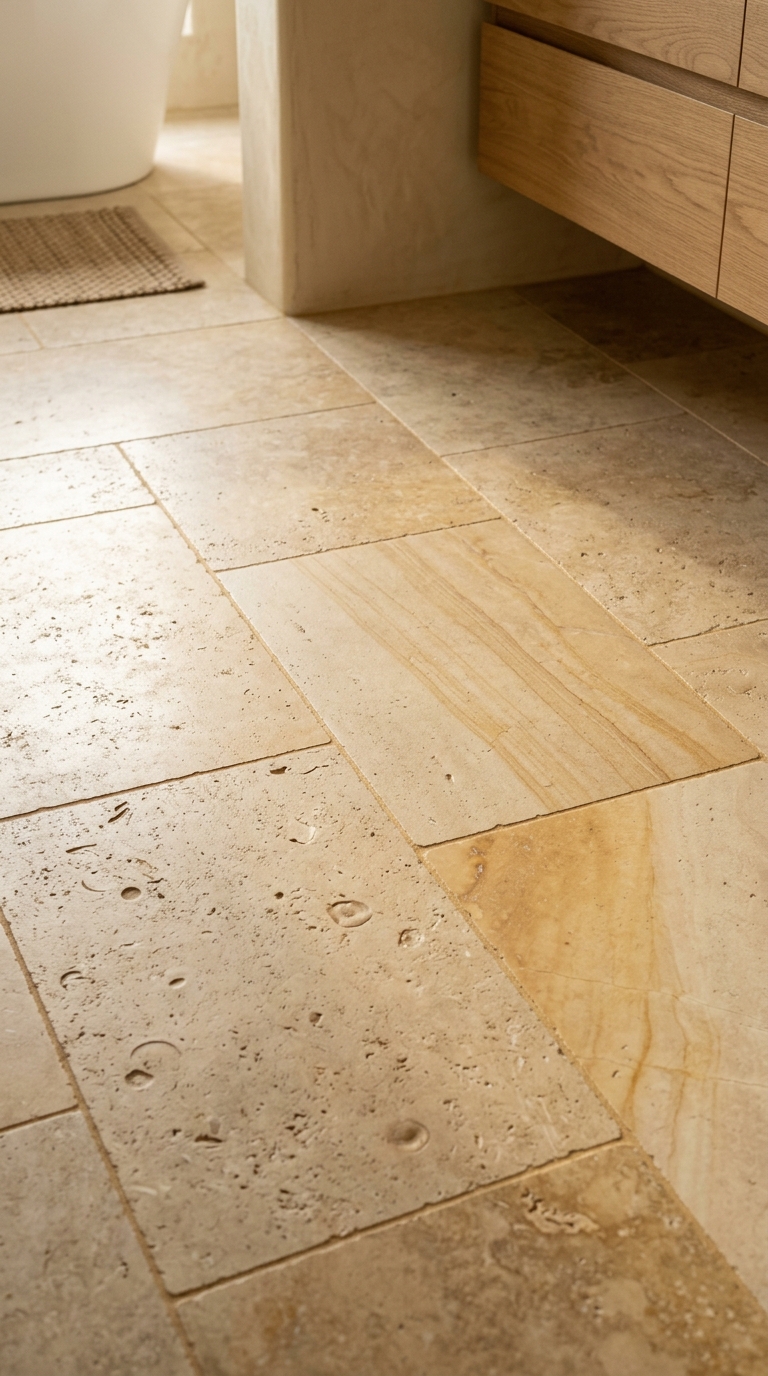
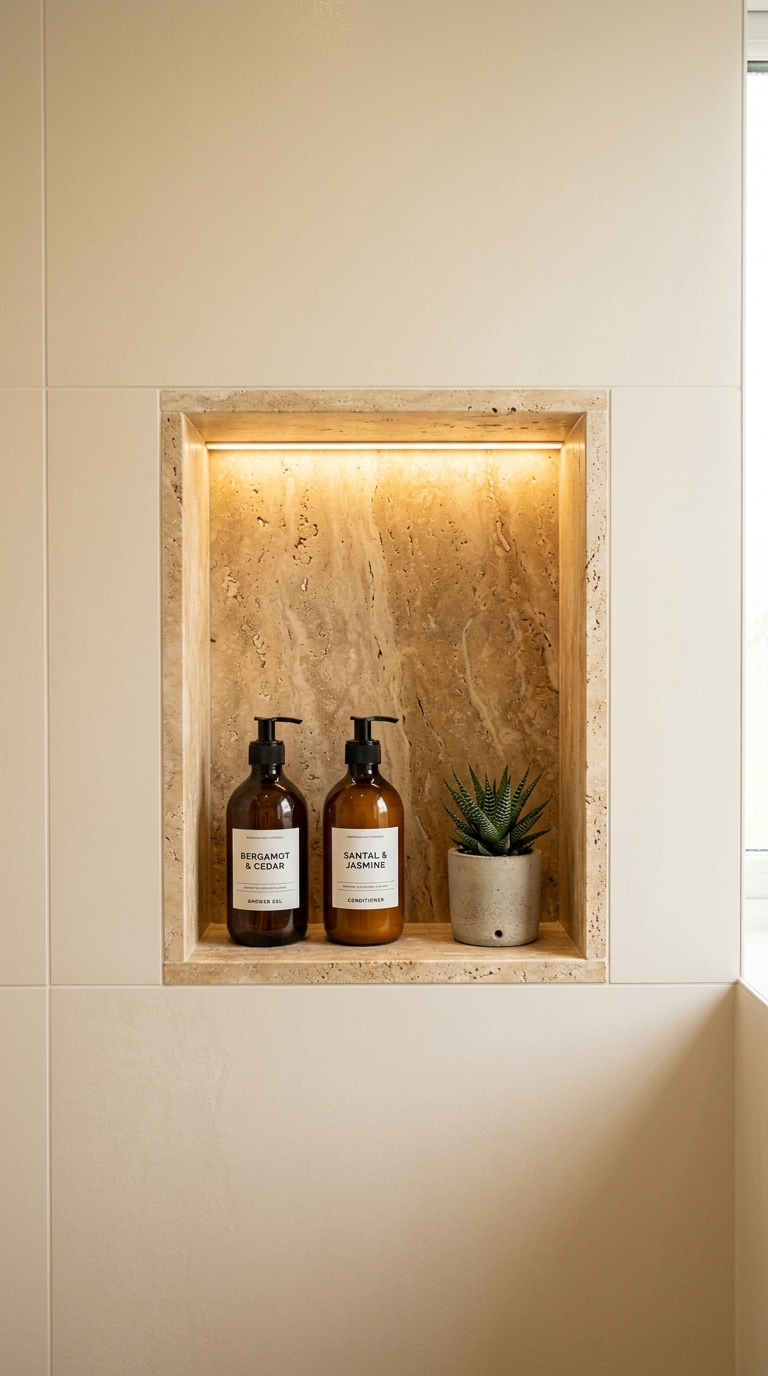
11. Travertine-Look Porcelain in the Niche — Natural Warmth
For shower niches that harmonise with a natural stone aesthetic, travertine-look porcelain brings warm earth tones and subtle veining into the recessed shelf. The warm beige and cream tones of travertine-look porcelain complement warm water and steam — the niche appears to glow under warm shower light.
The travertine pattern inside the niche creates a visual connection to natural stone without requiring genuine stone maintenance. The porcelain handles the constant moisture exposure that makes genuine travertine impractical in a shower niche.
Pair travertine-look niche tiles with surrounding wall tiles in warm ivory or warm white. The tonal relationship between the niche and the surrounding wall should be close enough to feel cohesive but different enough to read as a deliberate accent.
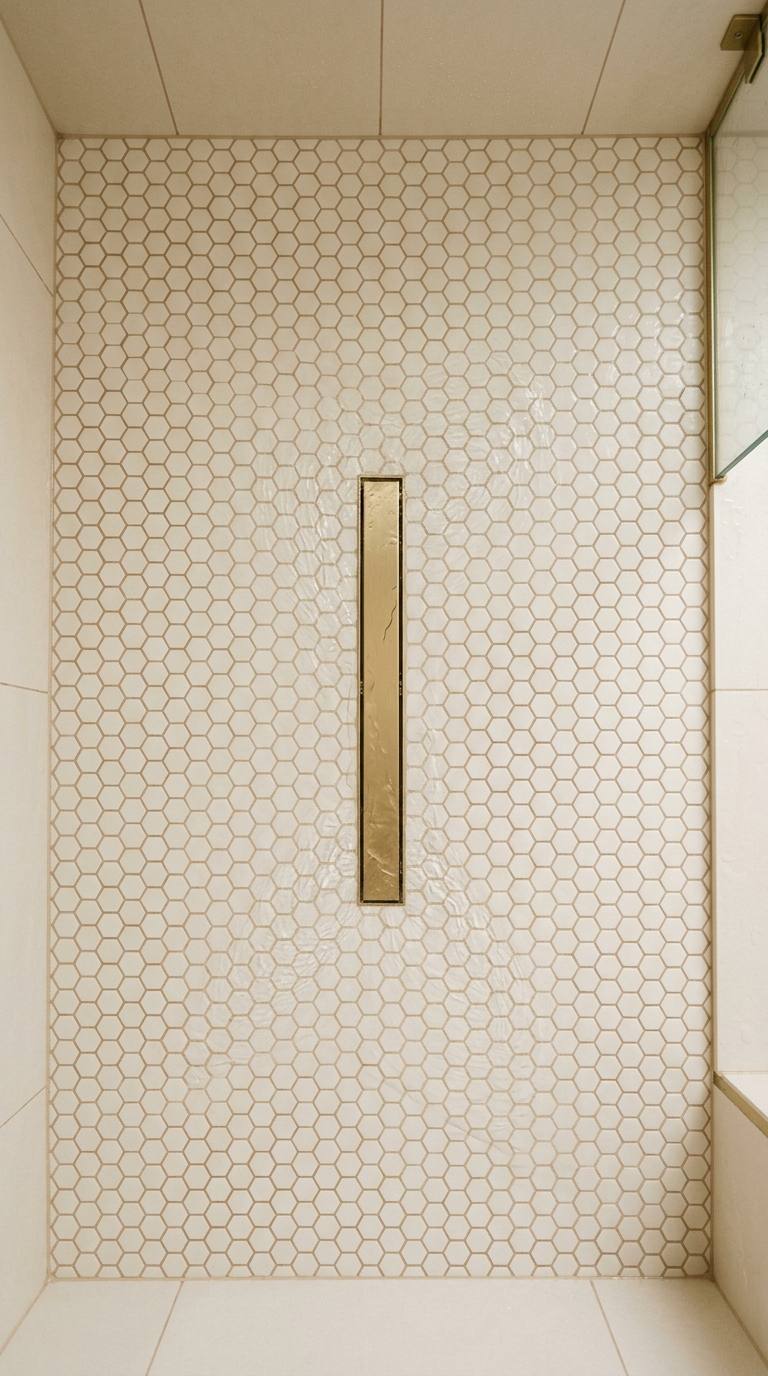
12. Hexagonal Mosaics on the Shower Floor — Grip and Geometry
The shower floor demands a tile that provides slip resistance when wet. Small hexagonal mosaics — with their abundant grout lines — create the texture and grip that larger tiles cannot achieve.
Beyond function, hexagonal mosaics bring geometric interest to the shower floor. The honeycomb pattern catches light differently than any rectangular tile, creating a surface that feels more considered and more designed than a simple square mosaic would.
Warm white hexagons with warm grey grout create a shower floor that is both safe and beautiful. The small scale of the tiles means the floor reads as a textured surface rather than individual shapes — the pattern is there for those who look closely, but it does not demand attention from those who do not.
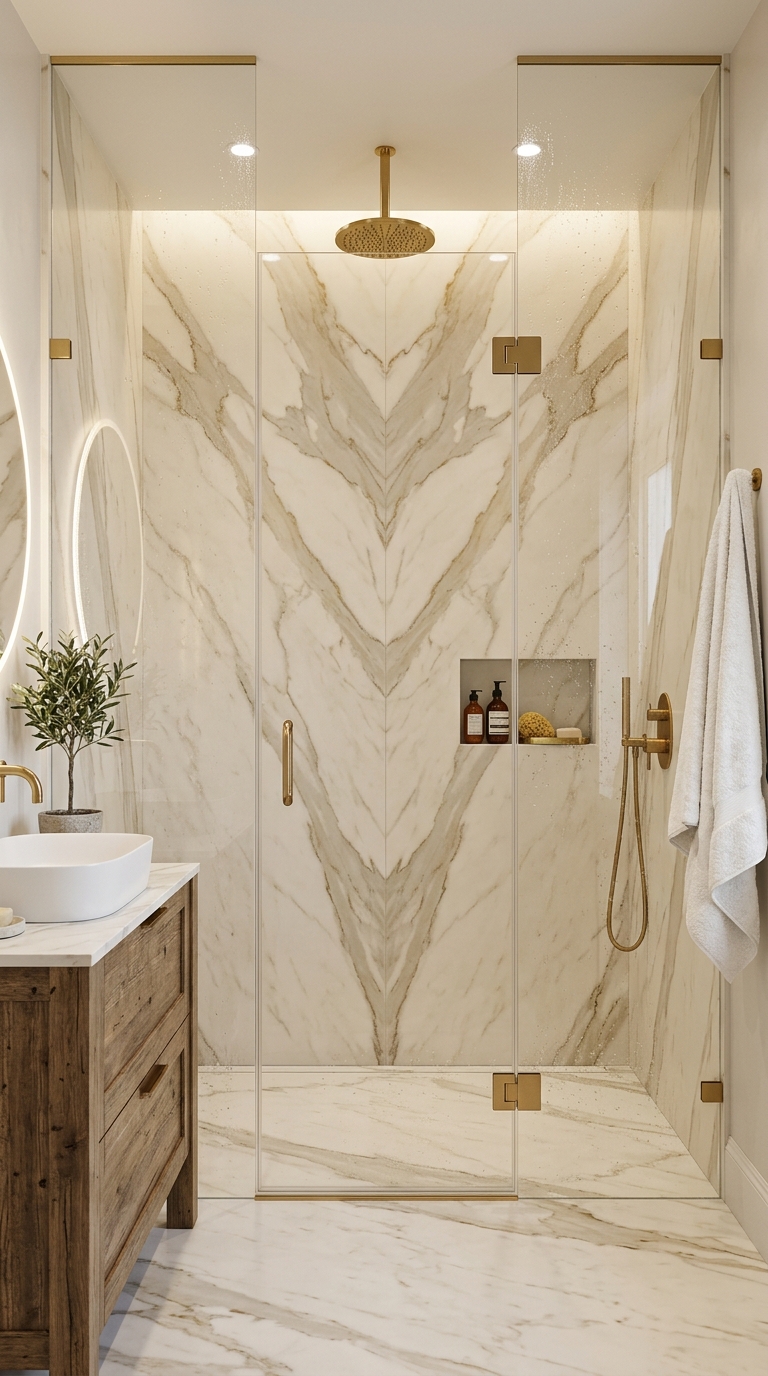
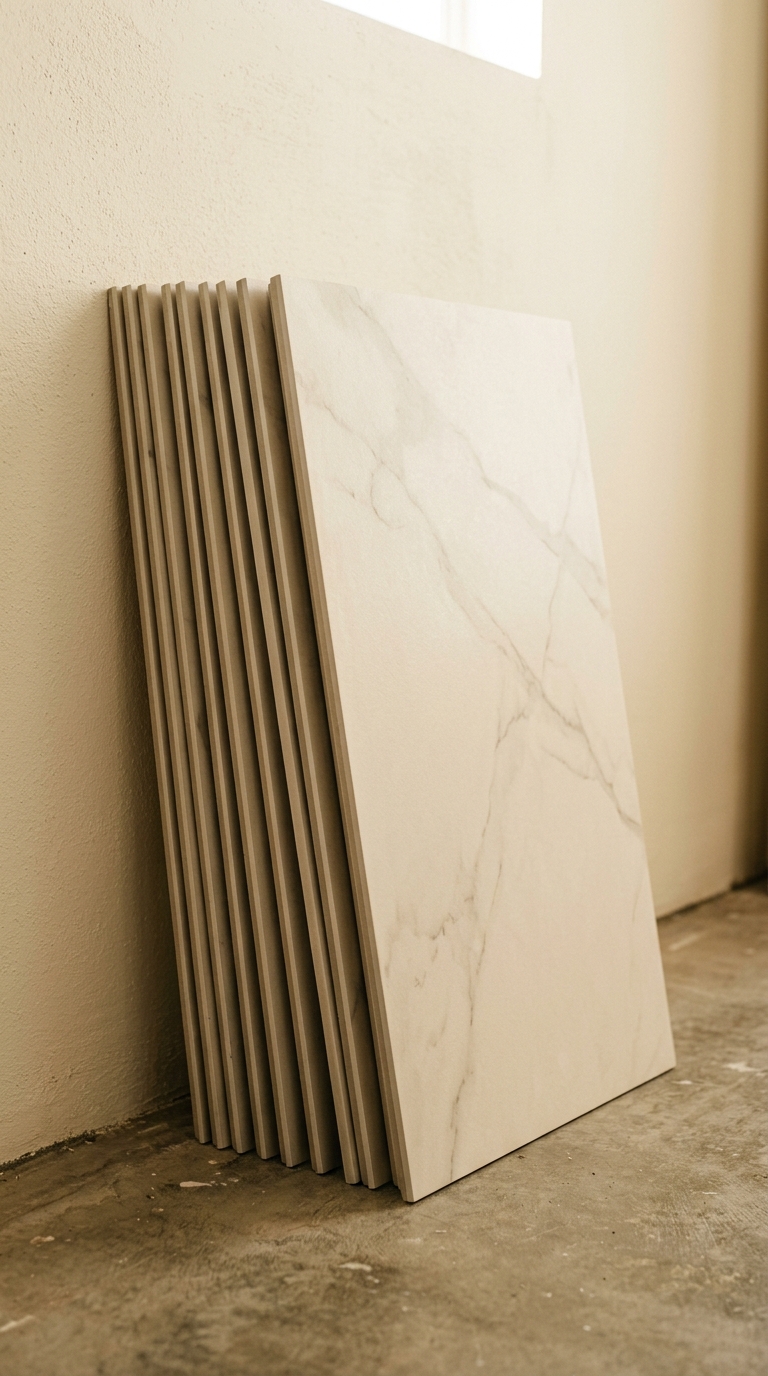
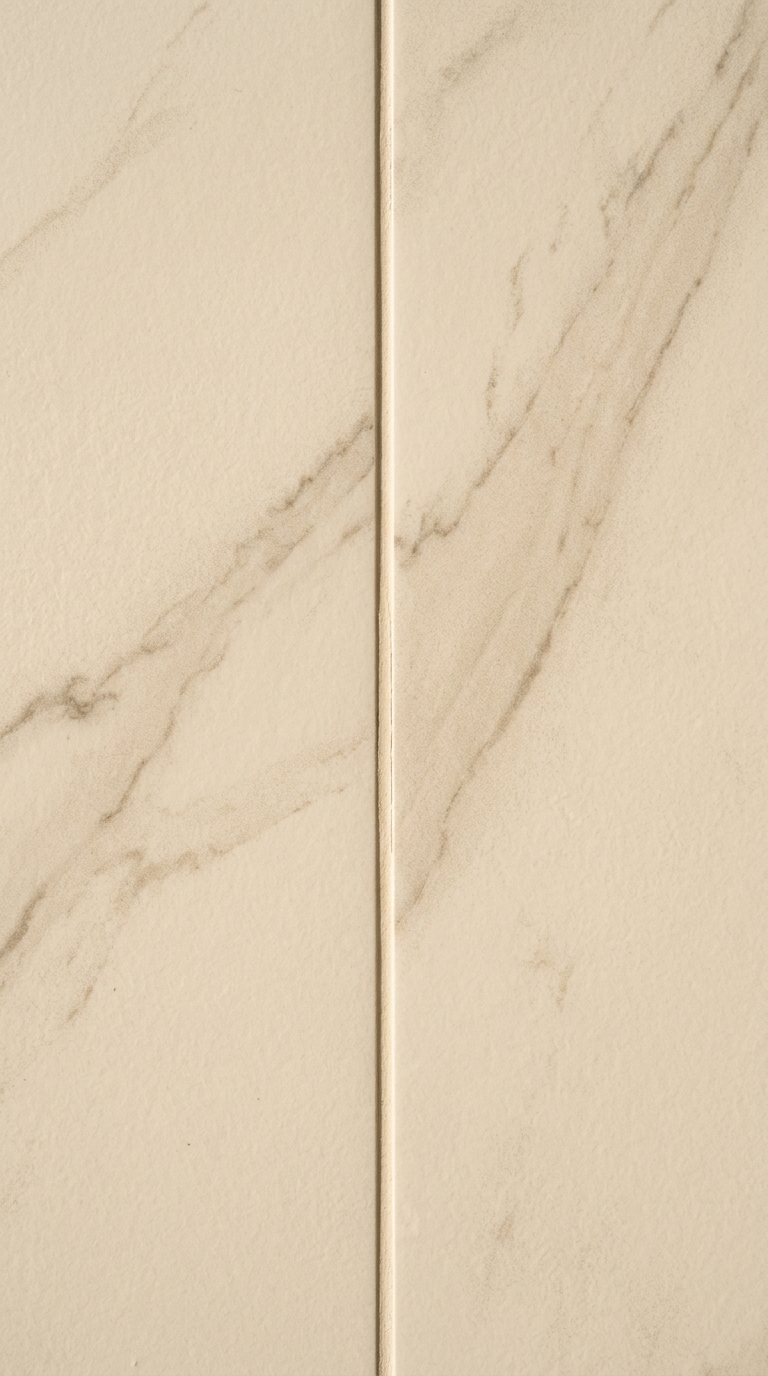
13. Marble-Look Slabs — The Seamless Shower
Large-format marble-look porcelain slabs (up to 1600mm x 3200mm) can cover an entire shower wall in a single piece — no grout lines, no joints, no interruption. The result is a shower that looks like it was carved from a single block of marble.
The absence of grout lines is both aesthetic and practical. Visually, the continuous surface reads as luxurious and seamless. Practically, the absence of grout joints eliminates the mould and mildew that collect in shower grout lines over time.
Marble-look slabs in warm Calacatta or warm Carrara patterns — with warm grey or warm gold veining rather than cool grey — bring the drama of marble without marble’s porosity, staining, and maintenance requirements.
Part 4: Pattern and Layout — The Visual Intelligence
The pattern in which tiles are laid is a design decision as important as the tile itself. The same tile in two different patterns creates two different bathrooms. Pattern is how you make simple tiles extraordinary.
14. The Running Bond — Classic for a Reason
The running bond — each tile offset by half from the tile above — is the most common tile pattern, and it endures because it works. The offset creates a subtle directional energy without the intensity of herringbone. The eye follows the offset lines naturally, and the room feels organised and calm.
In a bathroom, running bond on wall tiles creates a surface that feels orderly without being rigid. The offset introduces just enough variation to prevent the grid from feeling monotonous. It is the pattern for people who want their bathroom to feel designed without being decorated.
Running bond works with any rectangular tile — subway tiles, plank tiles, wood-look tiles. The pattern adapts to the tile’s proportions and always produces a result that feels intentional.
15. Herringbone on the Floor — Directional Warmth
Herringbone on the bathroom floor creates a visual flow that directs the eye (and the body) into the room. The V-pattern points toward the room’s centre, drawing you forward and making the entrance feel like a threshold into something designed.
The pattern is most effective with rectangular tiles in warm tones — wood-look planks in warm oak, or stone-look rectangles in warm limestone. The warm colour harmonises with the pattern’s energy, creating a floor that feels both dynamic and welcoming.
Herringbone on the floor is a more committed design choice than running bond. It says: someone thought about this. Someone made a decision here. The result rewards that decision every time you walk across it.
16. Large-Format Tiles — Fewer Lines, More Space
Large-format tiles (600mm x 600mm, 600mm x 1200mm, or larger) reduce the number of grout lines in a bathroom, and every eliminated grout line is a visual interruption removed. The floor and walls read as larger, more continuous surfaces.
In small bathrooms, large-format tiles are particularly powerful. A 600mm x 1200mm tile on a small bathroom wall means only two or three tiles cover the entire surface. The eye sees a near-continuous surface rather than a tiled grid. The room feels bigger because the visual texture is simpler.
The practical benefit is equally significant: fewer grout lines means less cleaning, less mould, and less maintenance over the bathroom’s lifetime.
Part 5: Material Choices — The Sensory Decision
The material of your bathroom tile determines not just how it looks but how it feels — underfoot, under hand, and in the light it reflects. Material is a sensory decision, and the senses are what make a bathroom feel warm or cold, inviting or clinical.
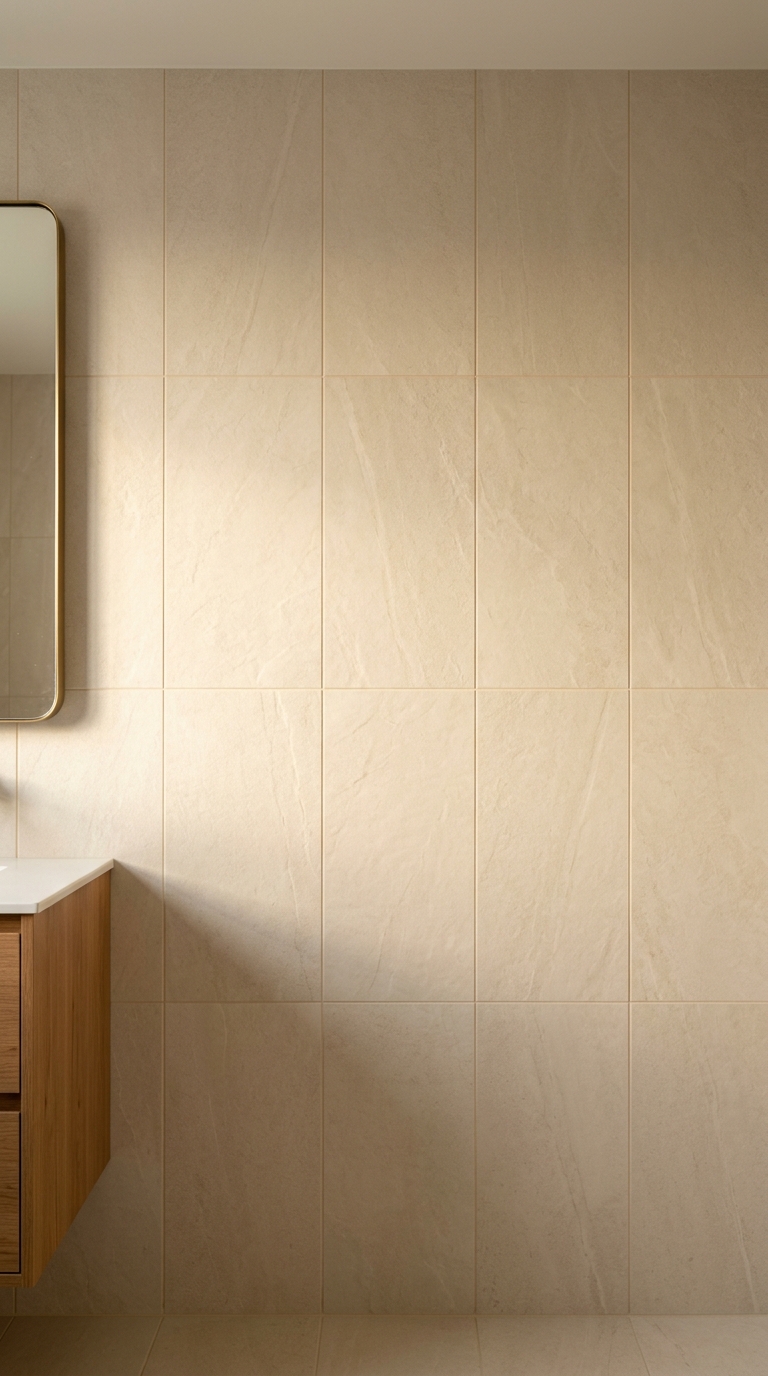
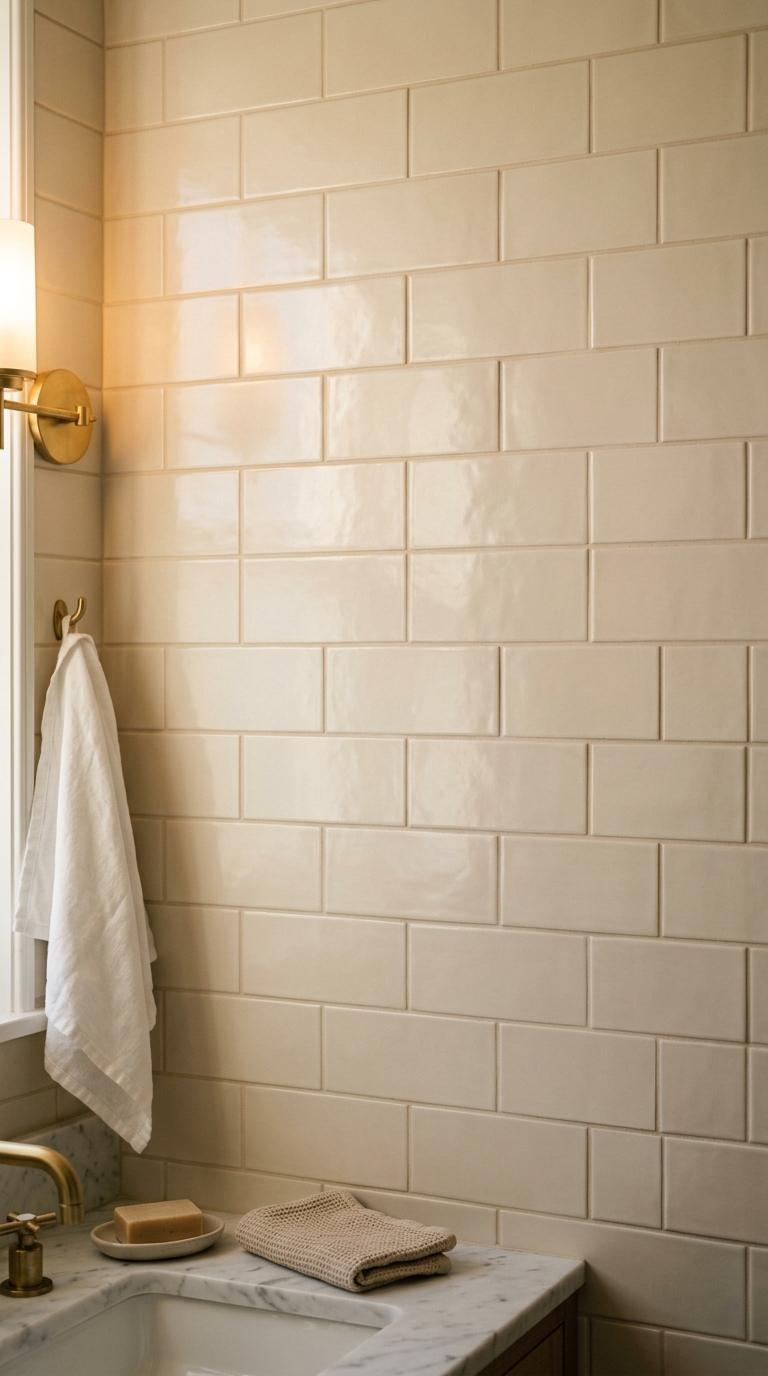
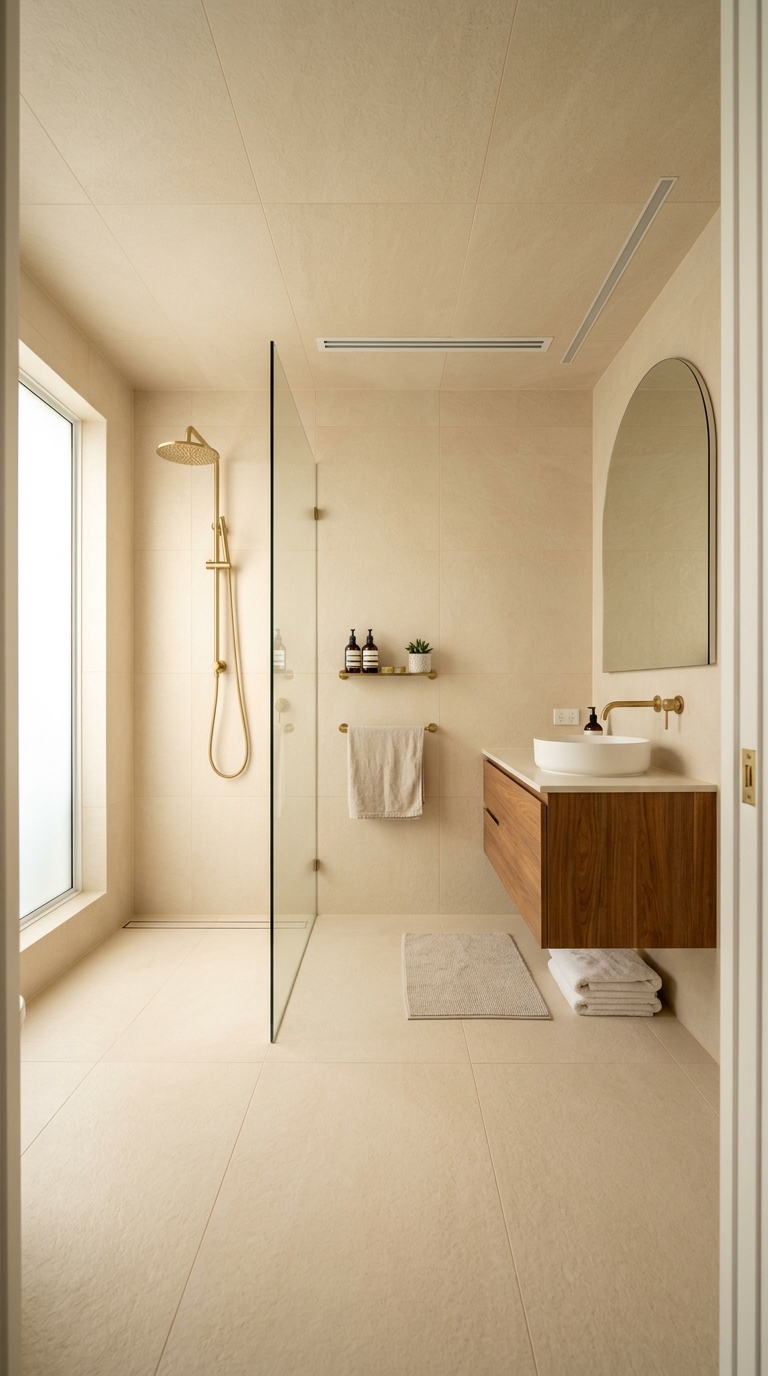
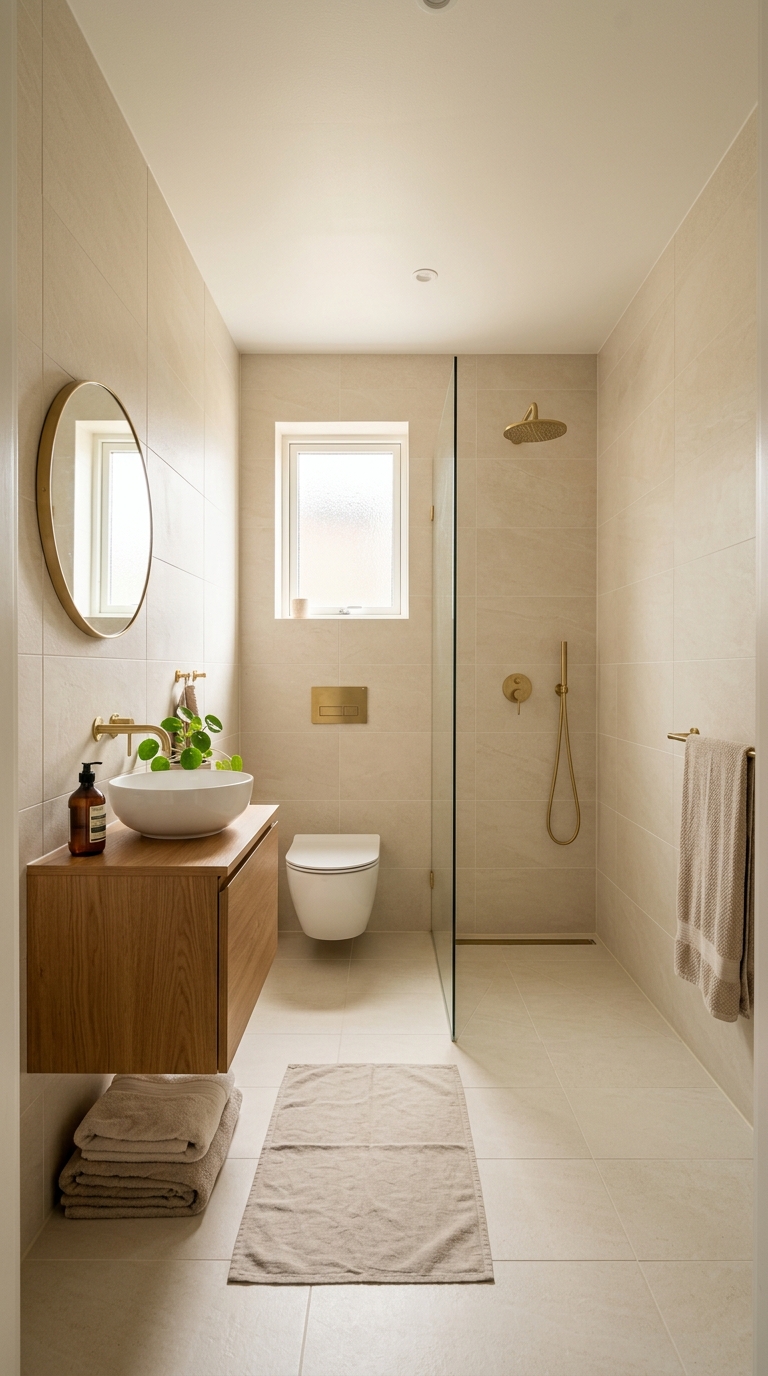
17. Warm Ivory Porcelain — The Universal Foundation
If there is one tile material that works in every bathroom regardless of size, style, or light conditions, it is warm ivory porcelain. Not bright white (too clinical). Not cold grey (too sterile). Warm ivory — the colour of natural limestone, of heavy cream, of the inside of a perfectly baked meringue.
Warm ivory porcelain on floor and walls creates a seamless warm envelope that makes small bathrooms feel larger, dark bathrooms feel lighter, and every other material in the room look warmer. It is the universal foundation.
Choose porcelain with subtle tonal variation — slight shifts from warm cream to warm sand across the surface. This variation adds depth and prevents the tile from reading as flat or manufactured.
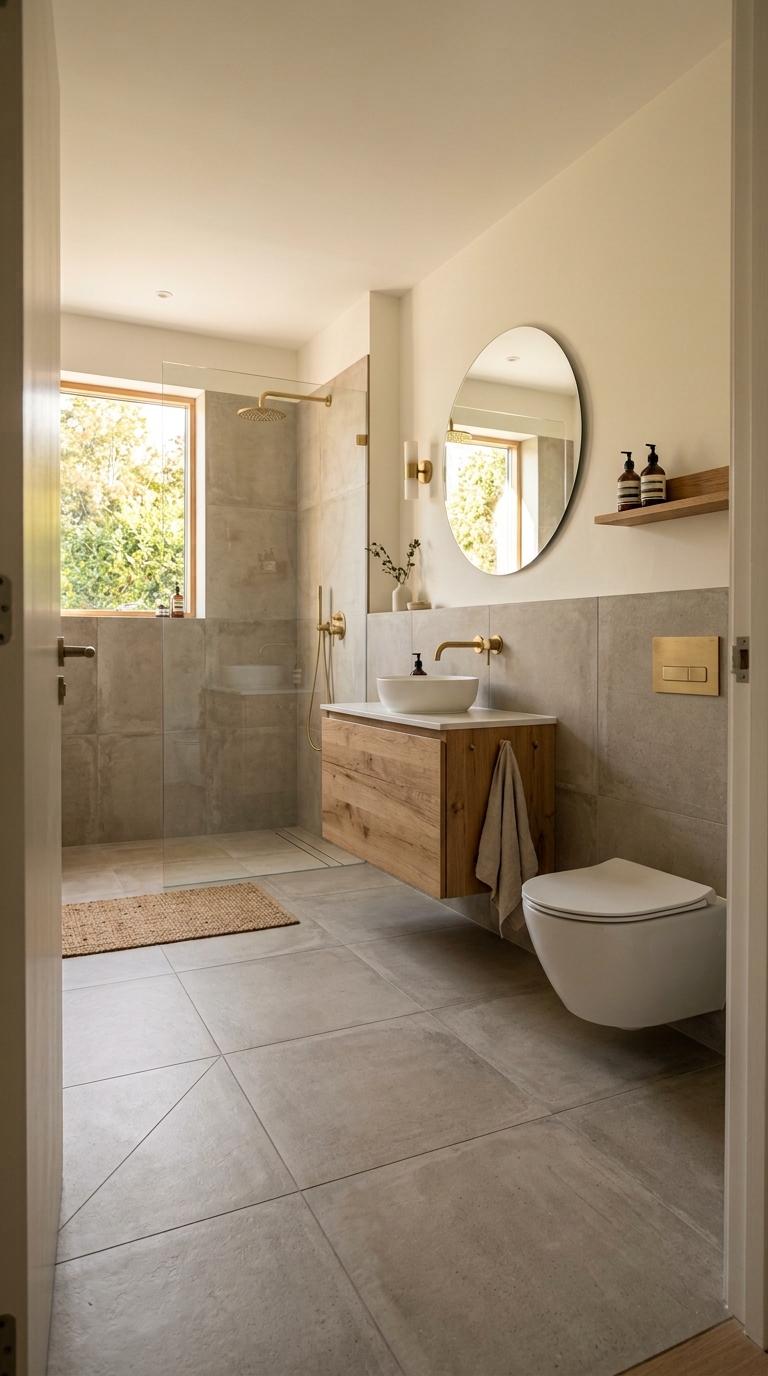
18. Concrete-Look Tiles — Industrial Warmth
Concrete-look porcelain tiles bring the raw, textural quality of concrete into the bathroom without concrete’s porosity, staining, and sealing requirements. The matte surface, the subtle aggregate texture, and the warm grey tones create a floor or wall that feels grounded and elemental.
The warmth in concrete-look tiles comes from the undertone. Warm concrete-look tiles lean toward beige-grey rather than blue-grey. The warm version reads as industrial-chic. The cool version reads as industrial-cold. The difference is one undertone — choose warm.
Concrete-look tiles work particularly well on floors paired with warmer wall tiles. The industrial floor grounds the room while warmer walls and fixtures soften the industrial edge into something inviting.
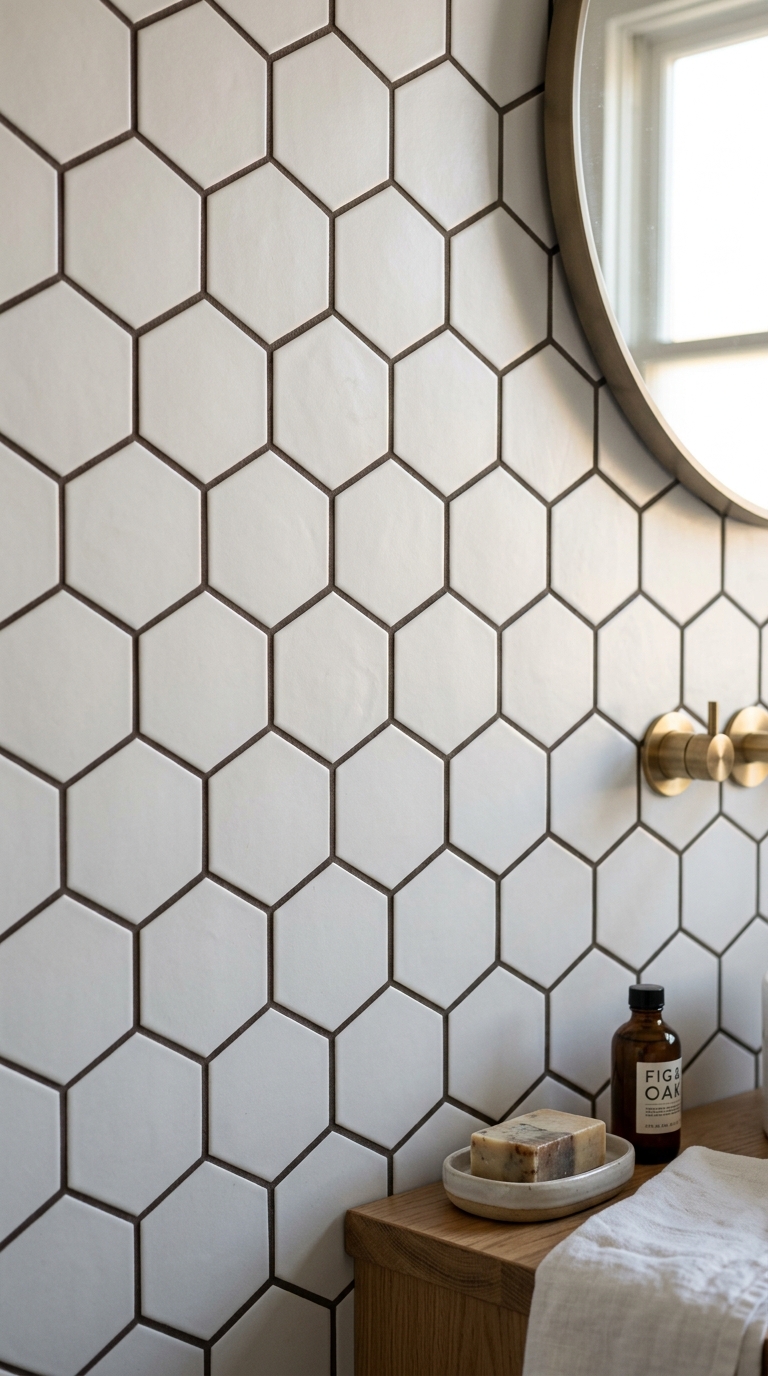
19. White Hexagonal with Dark Grout — The Graphic Statement
White hexagonal tiles with dark grout create the most graphic, high-contrast bathroom tile combination available. The white hexagons provide brightness and warmth. The dark grout provides sharp definition that outlines every tile and creates a honeycomb pattern that commands attention.
This combination works on floors, where the dark grout creates slip resistance (more grout line equals more grip) while the white tiles maintain brightness. The contrast between white tile and dark grout is the design — no additional colour, pattern, or material needed.
The dark grout is also practical: it hides discolouration far better than white grout, which means the floor looks cleaner for longer between deep cleanings.
20. Natural Stone-Look Porcelain — Organic Variation
Natural stone tiles — marble, travertine, limestone, slate — are beautiful because of their variation. No two stone tiles are identical. The veining, the colour shifts, the surface texture — each tile is a unique piece of geological history.
Stone-look porcelain captures this variation in a material that does not require sealing, does not stain, and does not crack. The printing technology has advanced to the point where stone-look porcelain is visually indistinguishable from genuine stone at normal viewing distances.
The key is choosing stone-look porcelain with genuine variation — not a repeating pattern that becomes obvious across a large surface. Look for tiles with at least 20 different face patterns to ensure the installed surface reads as natural rather than printed.
Part 6: Practical Details — The Decisions That Matter
The beauty of bathroom tile means nothing if the practical details are wrong. Grout width, transition details, and maintenance requirements determine whether the tile looks beautiful for years or deteriorates within months.
21. Narrow Grout Joints — The Seamless Surface
Narrow grout joints (1.5mm to 2mm) between large-format tiles create a surface that reads as nearly seamless. The thin grout line is barely visible from standing height, and the tiles appear to float against each other without the heavy grid that wider joints create.
Narrow joints require precision during installation — the tiles must be perfectly aligned, because even a 1mm deviation is visible in such a thin joint. The installation cost may be slightly higher, but the visual result — a surface that looks like a continuous sheet rather than individual tiles — justifies the investment.
For large-format tiles on walls, narrow joints are particularly effective. The wall reads as a single surface with subtle hairline divisions rather than a tiled grid.
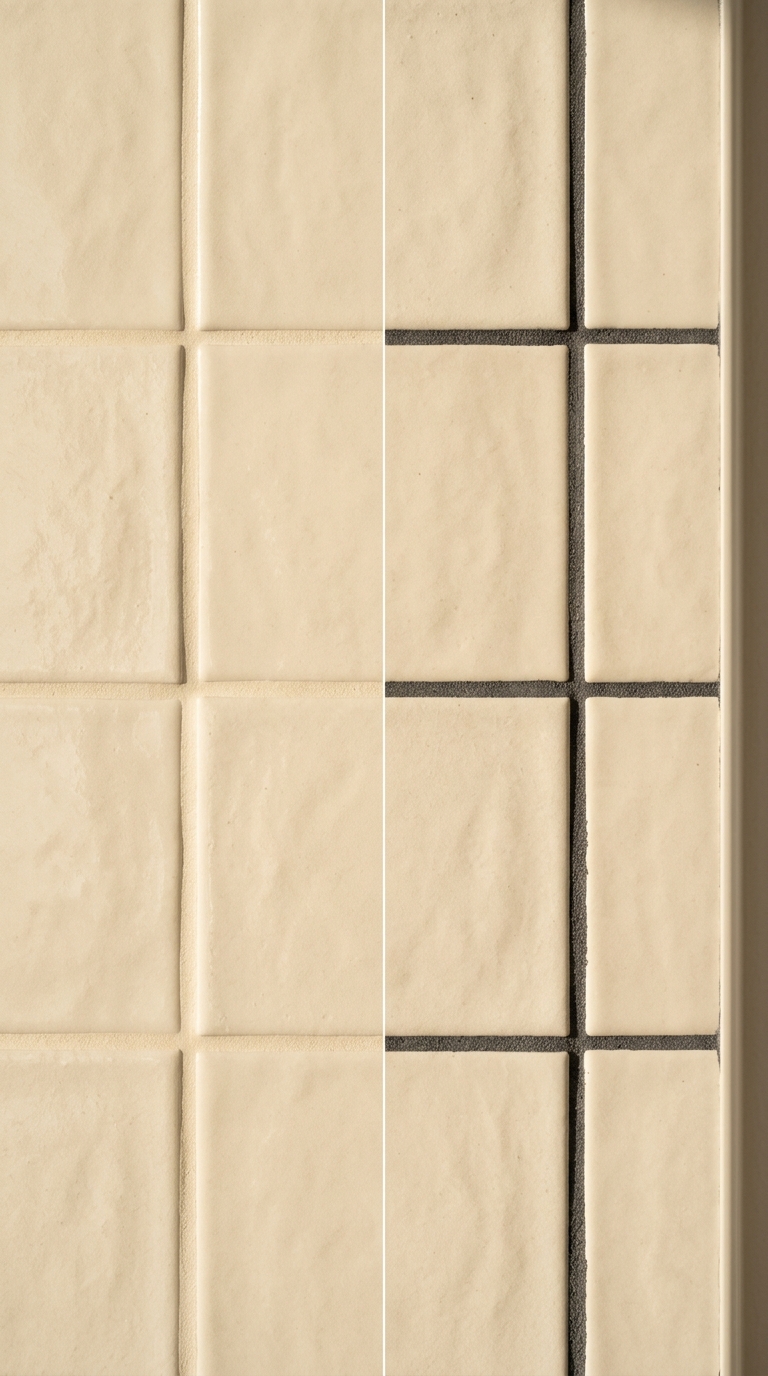
22. Warm-Toned Grout — The Harmonious Choice
Bright white grout against warm tiles creates a harsh grid that fragments the surface and introduces a visual harshness that undermines the tile’s warmth. Warm-toned grout — warm grey, warm sand, or a colour closely matched to the tile — minimises the grid and allows the tiles to read as a continuous surface.
The principle is simple: grout should complement the tile, not compete with it. Warm grey grout with warm ivory tiles. Warm sand grout with warm beige tiles. The closer the grout colour matches the tile colour, the more seamless the installed surface appears.
This is one of the most impactful decisions in bathroom tiling, and one of the most frequently overlooked. Most people choose white grout by default. The result is a grid-heavy surface that looks like exactly what it is — individual tiles separated by visible joints.
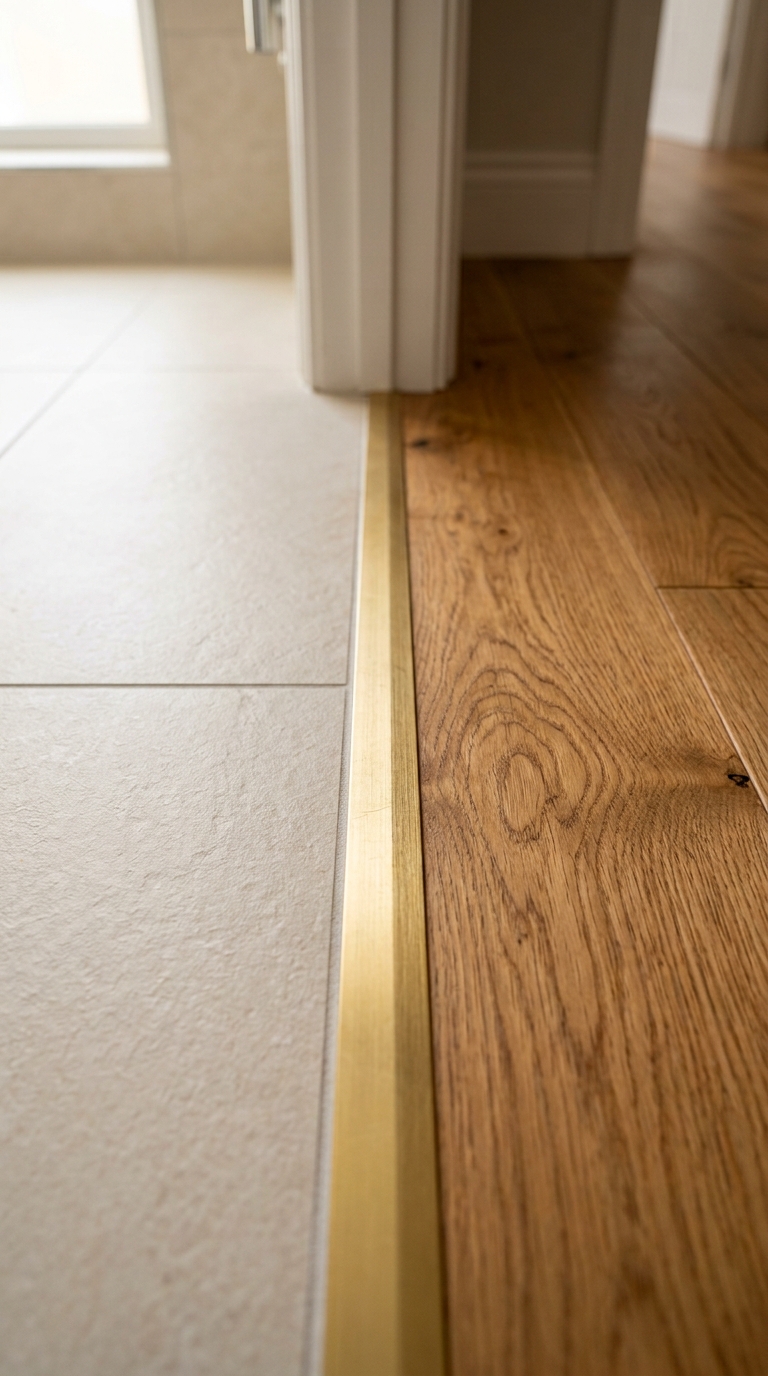
23. The Tile-to-Doorway Transition — Where Detail Becomes Design
The point where bathroom tile meets the adjacent room’s flooring is a detail that most people never think about — until they see it done badly. A clumsy transition between bathroom tile and hallway hardwood (or carpet, or vinyl) breaks the illusion of design and reveals the renovation’s seams.
The best transitions use a matching material — an oak threshold strip that connects the bathroom’s wood-look tile to the hallway’s oak flooring. The transition becomes a deliberate detail rather than an awkward junction. The two floor materials appear to meet intentionally rather than accidentally.
For tile-to-tile transitions (bathroom tile meeting kitchen tile, for example), the ideal solution is the same grout line continuing from one room to the next. The rooms appear to share a single floor surface rather than being separate installations.
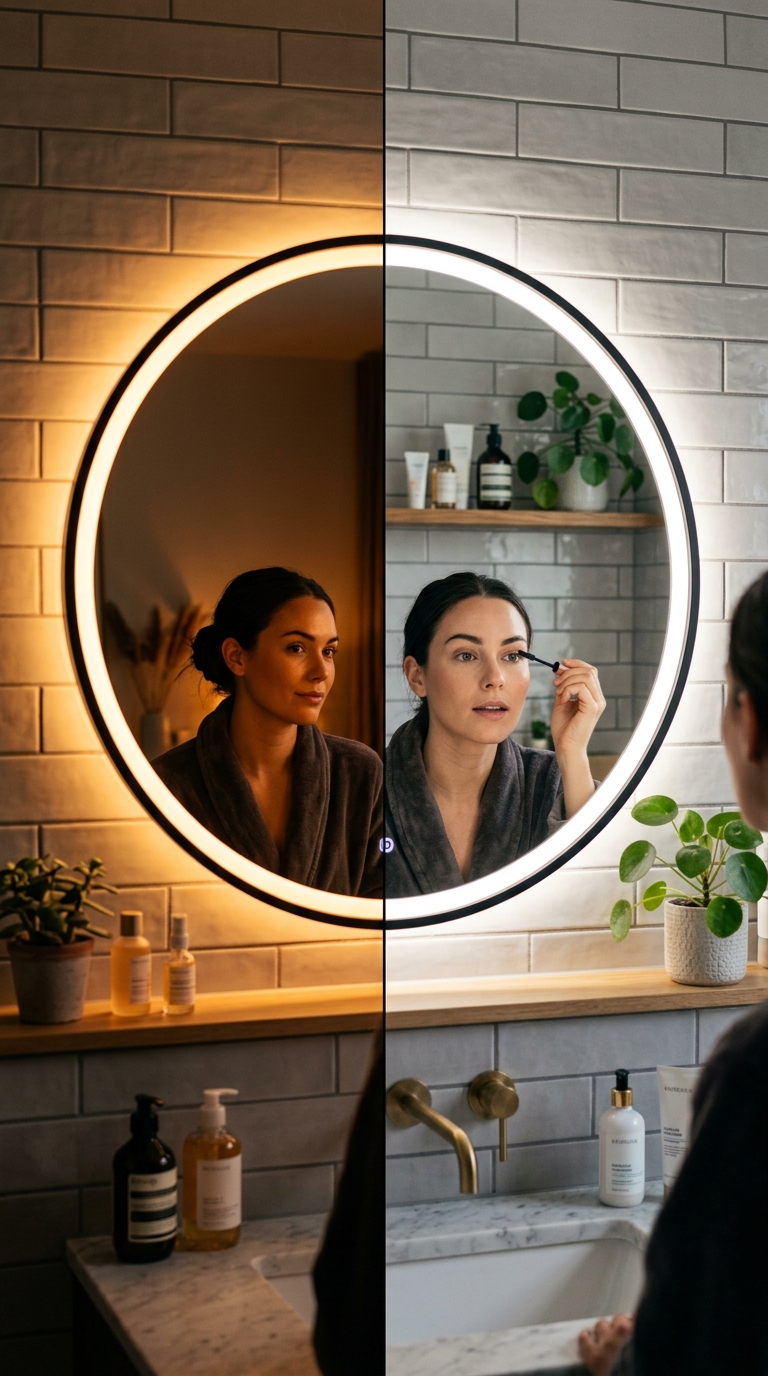
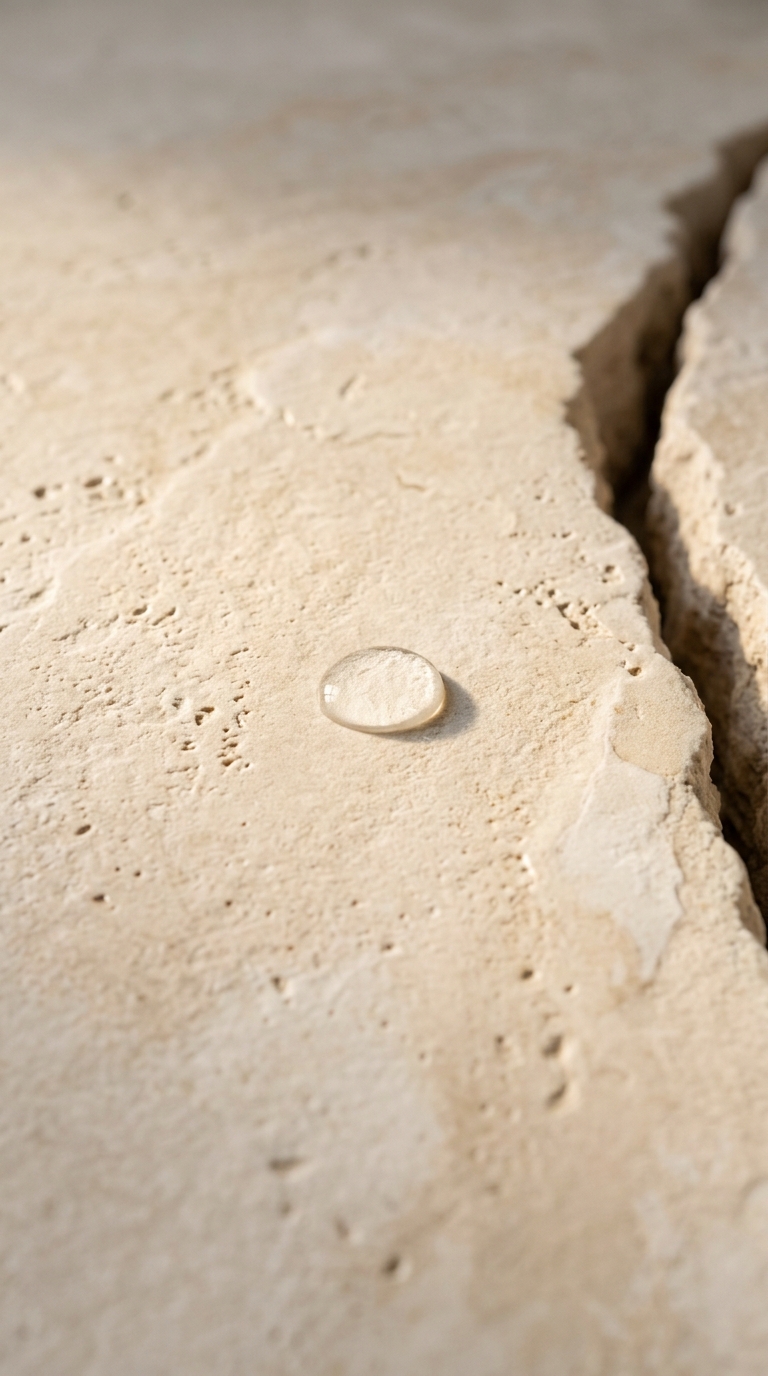
24. The Water-Droplet Test — Seeing Tile in Its True Context
Before committing to a bathroom tile, place the sample in the bathroom and wet it with a spray bottle. Observe how the tile looks wet — because a bathroom tile will spend a significant portion of its life wet.
Some tiles transform dramatically when wet: matte surfaces become glossy, colours deepen, textures become more pronounced. This transformation can be beautiful (a matte zellige that shimmers under water) or disappointing (a warm sand tile that turns grey when wet).
The wet test reveals the tile’s true bathroom character — not how it looks in the showroom under perfect conditions, but how it will look in the conditions it will actually inhabit.
Part 7: Tile for Specific Situations
Different bathroom situations demand different tile strategies. A small bathroom needs tiles that expand space. A dark bathroom needs tiles that capture and amplify light. A family bathroom needs tiles that withstand traffic.
25. Small Bathrooms — Light Tiles, Large Format, Diagonal
The optimal tile strategy for small bathrooms combines three principles: light colour, large format, and diagonal layout.
Light-coloured tiles (warm ivory, soft cream, warm white) reflect maximum light and make the room feel brighter and more open. Large-format tiles reduce grout lines and create a more continuous, spacious surface. The diagonal layout extends lines toward the corners and makes the floor appear larger.
Use the same light tile on both floor and walls for maximum continuity. The absence of a floor-wall colour contrast removes the visual boundary that normally closes a small room in. The room reads as a single warm envelope rather than a small box.
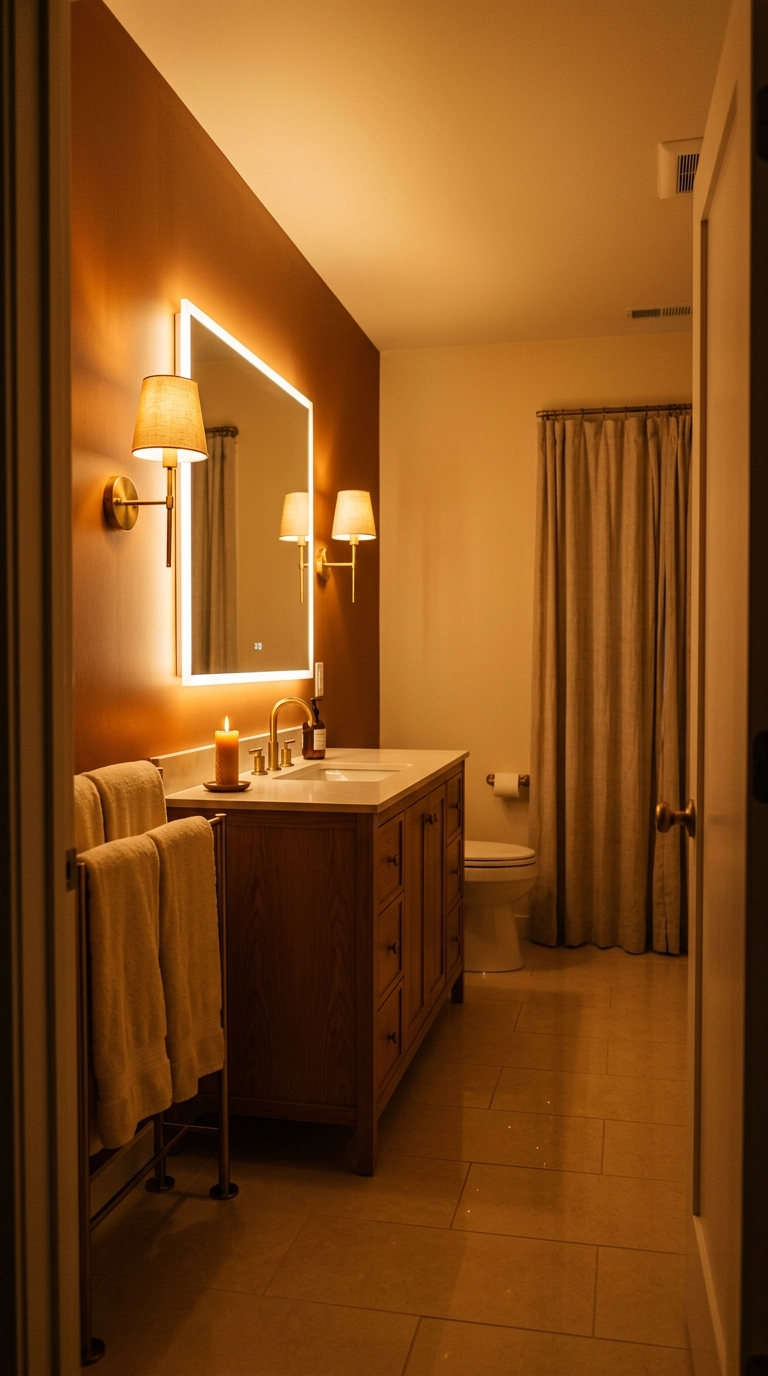
26. Dark Bathrooms — Reflective Tiles and Warm Light
Bathrooms with no natural light need tiles that maximise the artificial light available. Glossy or semi-glossy tiles in warm tones — warm ivory, soft cream, warm sand — reflect warm artificial light more efficiently than matte tiles, creating a brighter room from the same light sources.
The reflective surface bounces light from sconces, backlit mirrors, and ceiling fixtures across the room, multiplying the light’s reach. The warm undertone of the tile ensures that the reflected light stays warm rather than clinical.
Pair reflective wall tiles with a matte floor tile for contrast. The glossy walls amplify light. The matte floor absorbs just enough to prevent the room from feeling like a mirror box. The balance between reflective and absorptive creates a room that feels lit rather than reflected.
27. The Family Bathroom — Durable, Forgiving, Beautiful
A family bathroom needs tiles that withstand daily use by multiple people, tolerate frequent cleaning, and hide the wear that daily life inflicts.
Porcelain tiles in medium tones — warm greige, warm taupe, warm mid-grey — are the most family-friendly choice. The medium tone hides water spots, soap scum, and footprints better than very light or very dark tiles. The porcelain material resists scratching, staining, and moisture penetration. The matte finish provides slip resistance for children and adults alike.
For walls, large-format porcelain in the same warm mid-tone reduces grout lines (less cleaning, less mould) while maintaining visual cohesion with the floor. The medium tone on both surfaces creates a bathroom that looks clean even between cleanings.
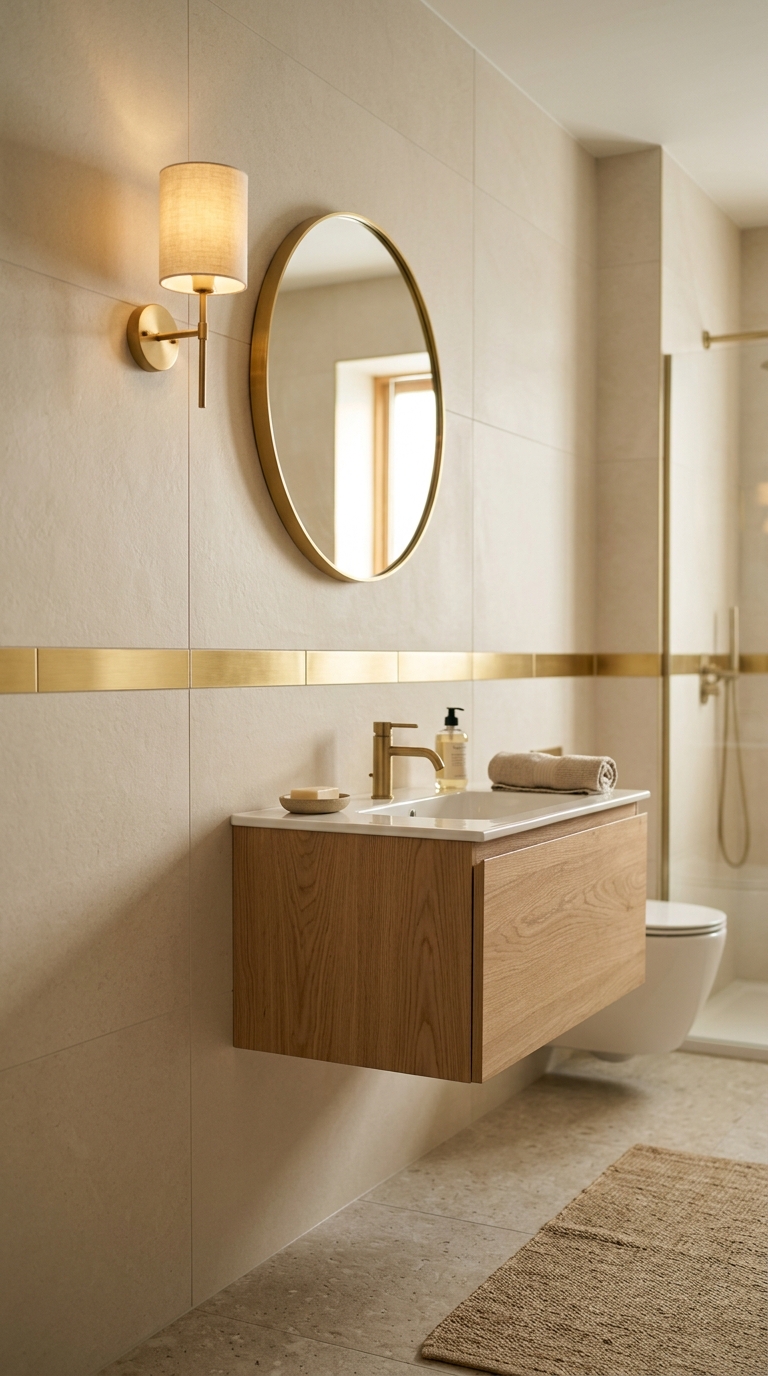
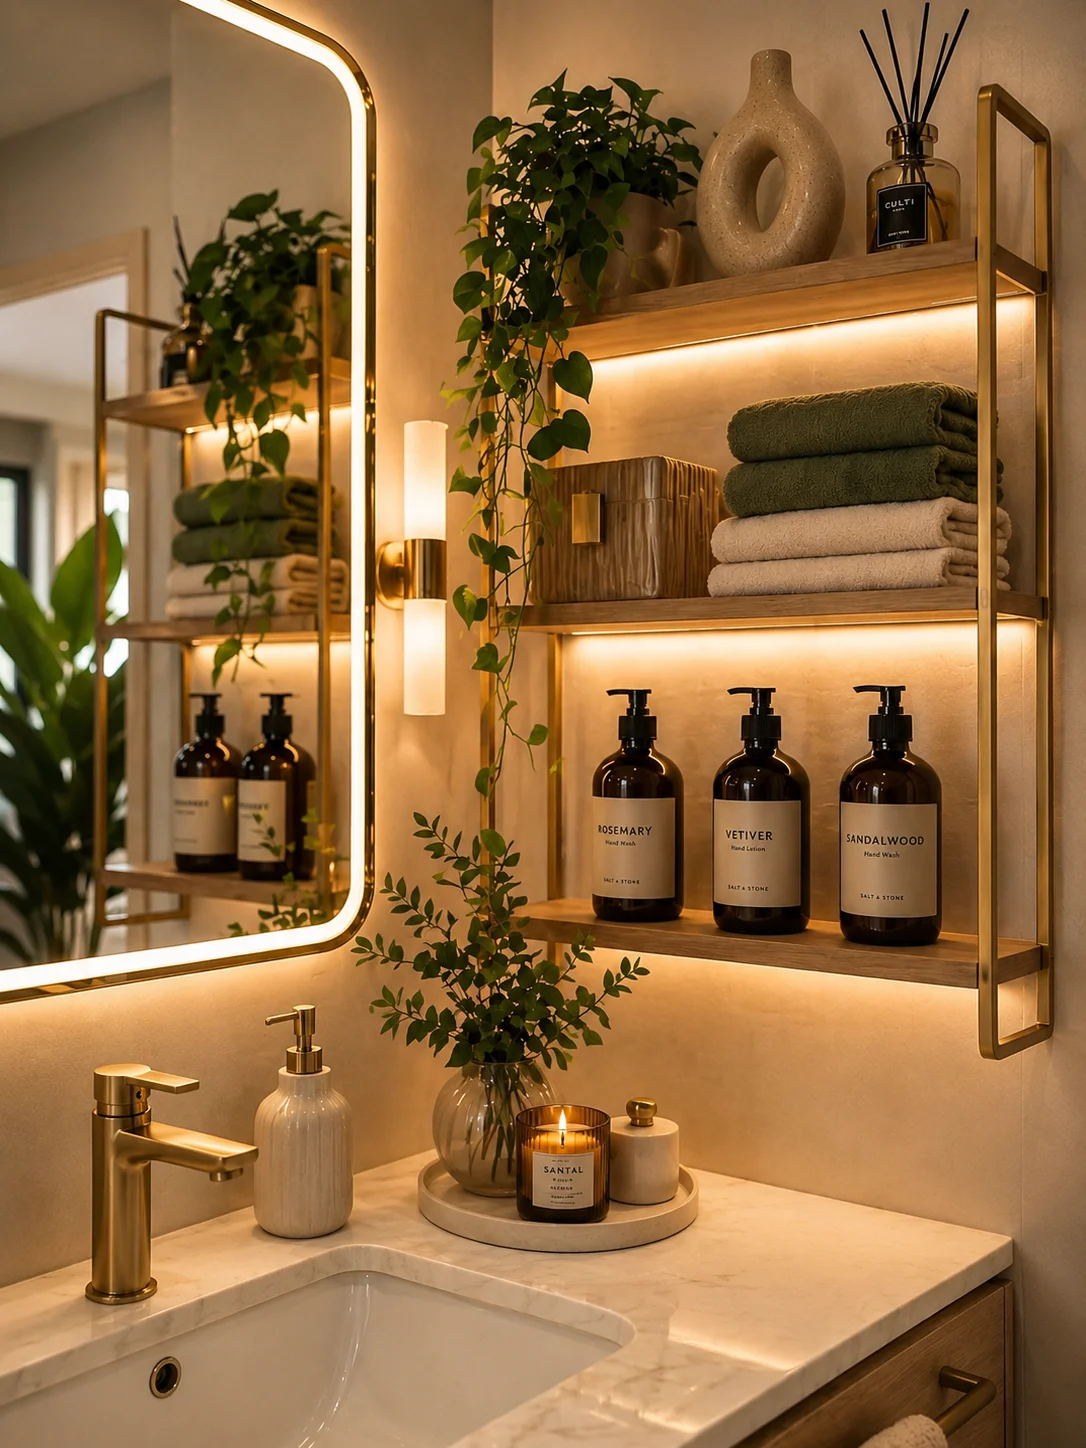
28. The Ensuite — Spa-Level Sophistication
An ensuite bathroom — connected to the bedroom, used by two people, designed for daily luxury — deserves tile that elevates the routine from functional to indulgent.
Full-height tiling in warm stone-look porcelain creates an immersive spa environment. The stone pattern on every surface — floor, walls, shower enclosure — envelops the room in natural warmth. The absence of painted surfaces means the room reads as a designed sanctuary rather than a tiled bathroom.
Add a zellige or mosaic feature wall in the shower for a focal point that rewards attention. The handmade texture of zellige against the machine-precision of stone-look porcelain creates a contrast that elevates the entire room from good to exceptional.
29. The Guest Bathroom — Lasting First Impression
A guest bathroom is seen infrequently but remembered permanently. It is the bathroom that visitors judge your taste by. The tile choice here matters disproportionately to the frequency of use.
A single statement tile — a bold pattern, a handmade texture, a dramatic colour — transforms a guest bathroom from forgettable to memorable. Because the room is used infrequently, the maintenance demands of a more demanding tile (genuine zellige, polished marble, intricate mosaic) are manageable.
Warm ivory walls with a zellige feature wall behind the vanity. A penny mosaic floor in warm cream. A herringbone layout in warm oak wood-look planks. Any of these choices creates a guest bathroom that visitors remember and compliment.
The goal is not extravagance. It is thoughtfulness — a bathroom that says: we considered you. We designed this for your comfort. You are welcome here.
Your Bathroom Tile Is Waiting for You to Choose It
The tile you choose will be the surface your bare feet meet every morning. It will be the backdrop against which you see your face in the mirror. It will be the material that holds warmth or reflects cold for years to come.
The safe choice — the default white subway in running bond, the builder-grade ceramic, the “everyone does this” option — is actually the least personal choice you can make. It guarantees a bathroom that feels like everyone’s bathroom rather than yours.
Choose a tile that makes you want to touch it. Choose a pattern that gives the room movement and direction. Choose a grout colour that lets the tile speak. Test samples in your bathroom’s actual light, wet them with a spray bottle, and live with them for a week before committing.
The bathroom you stand in every morning is surfaced by the decision you make today. Make it warm. Make it textured. Make it yours.
Explore more on TheNestiora:
→ Bathroom Color Ideas · → Small Bathroom Ideas · → Bathroom Storage Ideas · → Bathroom Lighting Ideas
If this story was useful, share it with someone you'd like to read it too.